# Demo application 
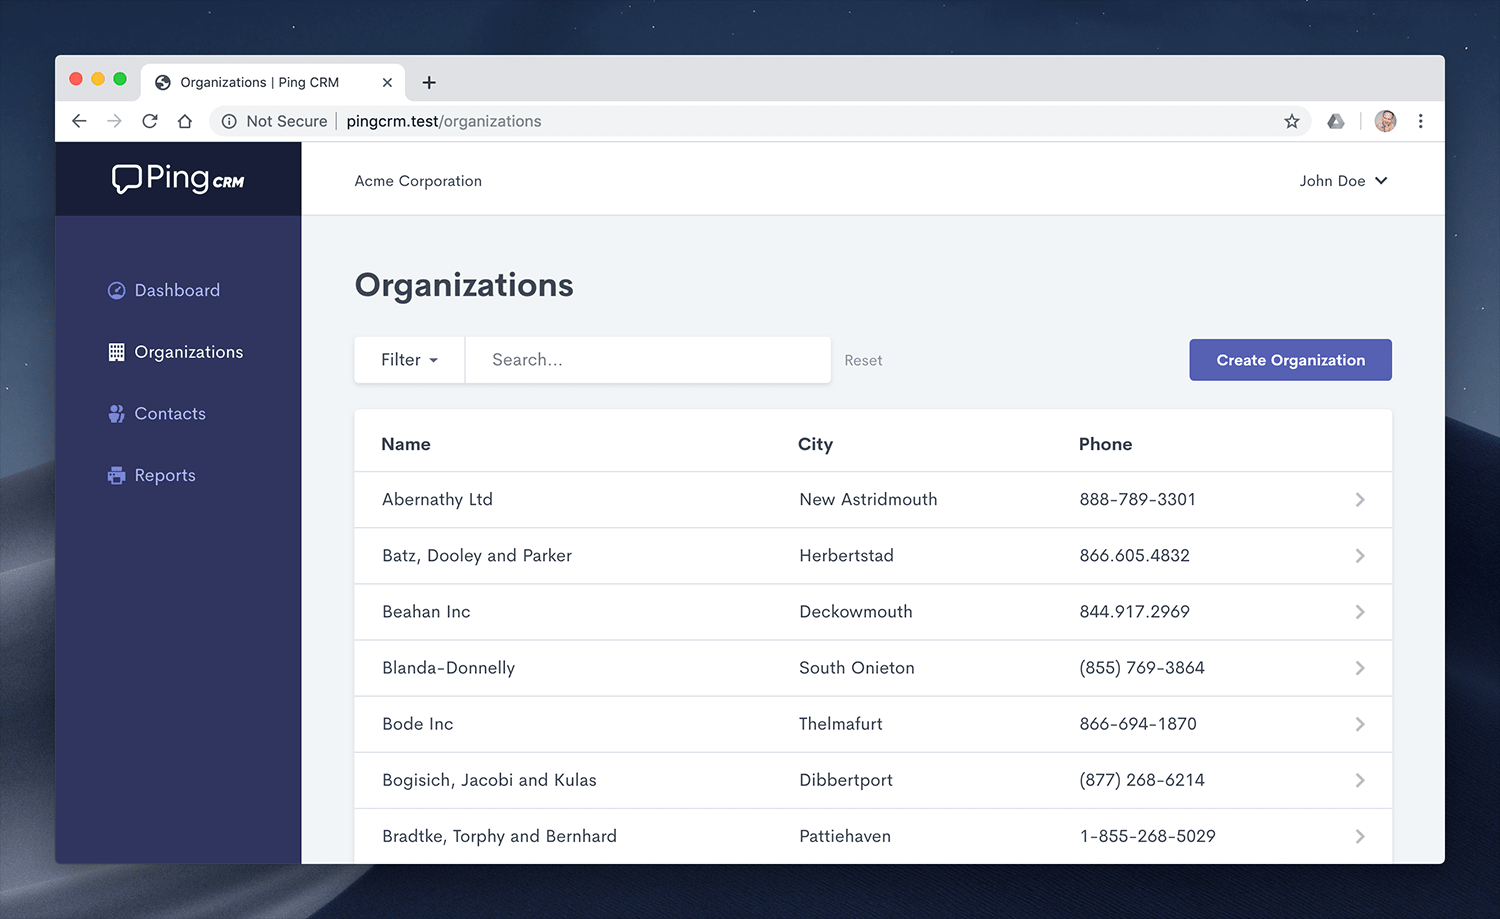
We've setup a demo app for Inertia.js called [Ping CRM](https://demo.inertiajs.com). This application is built using Laravel and Vue. You can find the source code on [GitHub](https://github.com/inertiajs/pingcrm). The Ping CRM demo is hosted on Heroku and the database is reset every hour. Please be respectful when editing data. [![Ping CRM](/pingcrm.png)](https://demo.inertiajs.com)In addition to the Vue version of Ping CRM, we also maintain a Svelte version of the application, which you can find [on GitHub](https://github.com/inertiajs/pingcrm-svelte). ## Third party Beyond our official demo app, Ping CRM has also been translated into numerous different languages and frameworks. - [Clojure/React](https://github.com/prestancedesign/pingcrm-clojure) by Michaël Salihi - [Echo/Vue](https://github.com/kohkimakimoto/pingcrm-echo) by Kohki Makimoto - [Grails/Vue](https://github.com/matrei/pingcrm-grails) by Mattias Reichel - [Laravel/React](https://github.com/Landish/pingcrm-react) by Lado Lomidze - [Laravel/Mithril.js](https://github.com/tbreuss/pingcrm-mithril) by Thomas Breuss - [Laravel/Svelte](https://github.com/zgabievi/pingcrm-svelte) by Zura Gabievi - [Ruby on Rails/Vue](https://github.com/ledermann/pingcrm/) by Georg Ledermann - [Symfony/Vue](https://github.com/aleksblendwerk/pingcrm-symfony) by Aleks Seltenreich - [Yii 2/Vue](https://github.com/tbreuss/pingcrm-yii2) by Thomas Breuss # Upgrade guide for v2.0 You can find the legacy docs for Inertia.js v1.0 at [v1.inertiajs.com](https://v1.inertiajs.com). ## What's new Inertia.js v2.0 is a huge step forward for Inertia! The core library has been completely rewritten to architecturally support asynchronous requests, enabling a whole set of new features, including: - [Polling](/polling) - [Prefetching](/prefetching) - [Deferred props](/deferred-props) - [Infinite scrolling](/merging-props) - [Lazy loading data on scroll](/load-when-visible) Additionally, for security sensitive projects, Inertia now offers a [history encryption API](/history-encryption), allowing you to clear page data from history state when logging out of an application. ## Upgrade dependencies To upgrade to the Inertia.js v2.0, first use npm to install the client-side adapter of your choice: Vue: ```bash npm install @inertiajs/vue3@^2.0 ``` React: ```bash npm install @inertiajs/react@^2.0 ``` Svelte: ```bash npm install @inertiajs/svelte@^2.0 ``` Next, upgrade the `inertiajs/inertia-laravel` package to use the `2.x` dev branch: Laravel: ```bash composer require inertiajs/inertia-laravel:^2.0 ``` ## Breaking changes While a significant release, Inertia.js v2.0 doesn't introduce many breaking changes. Here's a list of all the breaking changes: ### Dropped Laravel 8 and 9 support The Laravel adapter now requires Laravel 10 and PHP 8.1 at a minimum. ### Dropped Vue 2 support The Vue 2 adapter has been removed. Vue 2 reached End of Life on December 3, 2023, so this felt like it was time. ### Router `replace` method The previously deprecated `router.replace` method has been re-instated, but its functionality has changed. It is now used to make [Client Side](/manual-visits#client-side-visits) page visits. To make server-side visits that replace the current history entry in the browser, use the `replace` option: Vue: ```javascript router.get('/users', { search: 'John' }, { replace: true }) ``` ### Svelte adapter - Dropped support for Svelte 3 as it reached End of Life on June 20, 2023. - The `remember` helper has been rename to `useRemember` to be consistent with other helpers. - Updated `setup` callback in `app.js`. You need to pass `props` when initializing the `App` component. [See setup in app.js](/client-side-setup#initialize-the-inertia-app) - `setup` callback is now required in `ssr.js`. [See setup in ssr.js](/server-side-rendering#add-server-entry-point) ### Partial reloads are now async Previously partial reloads in Inertia were synchronous, just like all Inertia requests. In v2.0, partial reloads are now asynchronous. Generally this is desirable, but if you were relying on these requests being synchronous, you may need to adjust your code. # Server-side setup The first step when installing Inertia is to configure your server-side framework. Inertia maintains an official server-side adapter for [Laravel](https://laravel.com/). For other frameworks, please see the [community adapters](/community-adapters). Inertia is fine-tuned for Laravel, so the documentation examples on this website utilize Laravel. For examples of using Inertia with other server-side frameworks, please refer to the framework specific documentation maintained by that adapter. ## Laravel starter kits Laravel's [starter kits](https://laravel.com/docs/starter-kits), Breeze and Jetstream, provide out-of-the-box scaffolding for new Inertia applications. These starter kits are the absolute fastest way to start building a new Inertia project using Laravel and Vue or React. However, if you would like to manually install Inertia into your application, please consult the documentation below. ## Install dependencies First, install the Inertia server-side adapter using the Composer package manager. Laravel: ```bash composer require inertiajs/inertia-laravel ``` ## Root template Next, setup the root template that will be loaded on the first page visit to your application. This template should include your site's CSS and JavaScript assets, along with the `@inertia` and `@inertiaHead` directives. Laravel: ```markup @vite('resources/js/app.js') @inertiaHead @inertia ``` For React applications, it's recommended to include the `@viteReactRefresh` directive before the `@vite` directive to enable Fast Refresh in development. The `@inertia` directive renders a `
` element with an `id` of `app`. This element serves as the mounting point for your JavaScript application. You may customize the `id` by passing a different value to the directive. ```markup ... @inertia('custom-app-id') ``` If you change the `id` of the root element, be sure to update it [client-side](/client-side-setup#defining-a-root-element) as well. By default, Inertia's Laravel adapter will assume your root template is named `app.blade.php`. If you would like to use a different root view, you can change it using the `Inertia::setRootView()` method. ## Middleware Next we need to setup the Inertia middleware. You can accomplish this by publishing the `HandleInertiaRequests` middleware to your application, which can be done using the following Artisan command. ```sh php artisan inertia:middleware ``` Once the middleware has been published, append the `HandleInertiaRequests` middleware to the `web` middleware group in your application's `bootstrap/app.php` file. ```php use App\\Http\\Middleware\\HandleInertiaRequests; ->withMiddleware(function (Middleware $middleware) { $middleware->web(append: [ HandleInertiaRequests::class, ]); }) ``` This middleware provides a `version()` method for setting your [asset version](/asset-versioning), as well as a `share()` method for defining [shared data](/shared-data). ## Creating responses That's it, you're all ready to go server-side! Now you're ready to start creating Inertia [pages](/pages) and rendering them via [responses](/responses). Laravel: ```php use Inertia\\Inertia; class EventsController extends Controller { public function show(Event $event) { return Inertia::render('Event/Show', [ 'event' => $event->only( 'id', 'title', 'start_date', 'description' ), ]); } } ``` # Client-side setup Once you have your [server-side framework configured](/server-side-setup), you then need to setup your client-side framework. Inertia currently provides support for React, Vue, and Svelte. ## Laravel starter kits Laravel's [starter kits](https://laravel.com/starter-kits) provide out-of-the-box scaffolding for new Inertia applications. These starter kits are the absolute fastest way to start building a new Inertia project using Laravel and Vue or React. However, if you would like to manually install Inertia into your application, please consult the documentation below. ## Install dependencies First, install the Inertia client-side adapter corresponding to your framework of choice. Vue: ```bash npm install @inertiajs/vue3 ``` React: ```bash npm install @inertiajs/react ``` Svelte: ```bash npm install @inertiajs/svelte ``` ## Initialize the Inertia app Next, update your main JavaScript file to boot your Inertia app. To accomplish this, we'll initialize the client-side framework with the base Inertia component. Vue: ```js import { createApp, h } from 'vue' import { createInertiaApp } from '@inertiajs/vue3' createInertiaApp({ resolve: name => { const pages = import.meta.glob('./Pages/**/*.vue', { eager: true }) return pages[\`./Pages/\${name}.vue\`] }, setup({ el, App, props, plugin }) { createApp({ render: () => h(App, props) }) .use(plugin) .mount(el) }, }) ``` React: ```jsx import { createInertiaApp } from '@inertiajs/react' import { createRoot } from 'react-dom/client' createInertiaApp({ resolve: name => { const pages = import.meta.glob('./Pages/**/*.jsx', { eager: true }) return pages[\`./Pages/\${name}.jsx\`] }, setup({ el, App, props }) { createRoot(el).render() }, }) ``` Svelte 4: ```js import { createInertiaApp } from '@inertiajs/svelte' createInertiaApp({ resolve: name => { const pages = import.meta.glob('./Pages/**/*.svelte', { eager: true }) return pages[\`./Pages/\${name}.svelte\`] }, setup({ el, App, props }) { new App({ target: el, props }) }, }) ``` Svelte 5: ```js import { createInertiaApp } from '@inertiajs/svelte' import { mount } from 'svelte' createInertiaApp({ resolve: name => { const pages = import.meta.glob('./Pages/**/*.svelte', { eager: true }) return pages[\`./Pages/\${name}.svelte\`] }, setup({ el, App, props }) { mount(App, { target: el, props }) }, }) ``` The `setup` callback receives everything necessary to initialize the client-side framework, including the root Inertia `App` component. ## Resolving components The `resolve` callback tells Inertia how to load a page component. It receives a page name (string), and returns a page component module. How you implement this callback depends on which bundler (Vite or Webpack) you're using. Vue: ```js // Vite resolve: name => { const pages = import.meta.glob('./Pages/**/*.vue', { eager: true }) return pages[\`./Pages/\${name}.vue\`] }, // Webpack resolve: name => require(\`./Pages/\${name}\`), ``` React: ```js // Vite resolve: name => { const pages = import.meta.glob('./Pages/**/*.jsx', { eager: true }) return pages[\`./Pages/\${name}.jsx\`] }, // Webpack resolve: name => require(\`./Pages/\${name}\`), ``` Svelte: ```js // Vite resolve: name => { const pages = import.meta.glob('./Pages/**/*.svelte', { eager: true }) return pages[\`./Pages/\${name}.svelte\`] }, // Webpack resolve: name => require(\`./Pages/\${name}.svelte\`), ``` By default we recommend eager loading your components, which will result in a single JavaScript bundle. However, if you'd like to lazy-load your components, see our [code splitting](/code-splitting) documentation. ## Defining a root element By default, Inertia assumes that your application's root template has a root element with an `id` of `app`. If your application's root element has a different `id`, you can provide it using the `id` property. ```js createInertiaApp({ id: 'my-app', // ... }) ``` If you change the `id` of the root element, be sure to update it [server-side](/server-side-setup#root-template) as well. # Who is Inertia.js for? Inertia was crafted for development teams and solo hackers who typically build server-side rendered applications using frameworks like Laravel, Ruby on Rails, Django, or Phoenix. You're used to creating controllers, retrieving data from the database (via an ORM), and rendering views. But what happens when you want to replace your server-side rendered views with a modern, JavaScript-based single-page application frontend? The answer is always "you need to build an API". Because that's how modern SPAs are built. This means building a REST or GraphQL API. It means figuring out authentication and authorization for that API. It means client-side state management. It means setting up a new Git repository. It means a more complicated deployment strategy. And this list goes on. It's a complete paradigm shift, and often a complete mess. We think there is a better way. **Inertia empowers you to build a modern, JavaScript-based single-page application without the tiresome complexity.** Inertia works just like a classic server-side rendered application. You create controllers, you get data from the database (via your ORM), and you render views. But, Inertia views are JavaScript page components written in React, Vue, or Svelte. This means you get all the power of a client-side application and modern SPA experience, but you don't need to build an API. We think it's a breath of fresh air that will supercharge your productivity. # How it works With Inertia you build applications just like you've always done with your server-side web framework of choice. You use your framework's existing functionality for routing, controllers, middleware, authentication, authorization, data fetching, and more. However, Inertia replaces your application's view layer. Instead of using server-side rendering via PHP or Ruby templates, the views returned by your application are JavaScript page components. This allows you to build your entire frontend using React, Vue, or Svelte, while still enjoying the productivity of Laravel or your preferred server-side framework. As you might expect, simply creating your frontend in JavaScript doesn't give you a single-page application experience. If you were to click a link, your browser would make a full page visit, which would then cause your client-side framework to reboot on the subsequent page load. This is where Inertia changes everything. At its core, Inertia is essentially a client-side routing library. It allows you to make page visits without forcing a full page reload. This is done using the `` component, a light-weight wrapper around a normal anchor link. When you click an Inertia link, Inertia intercepts the click and makes the visit via XHR instead. You can even make these visits programmatically in JavaScript using `router.visit()`. When Inertia makes an XHR visit, the server detects that it's an Inertia visit and, instead of returning a full HTML response, it returns a JSON response with the JavaScript page component name and data (props). Inertia then dynamically swaps out the previous page component with the new page component and updates the browser's history state. **The end result is a silky smooth single-page experience.** 🎉 To learn more about the nitty-gritty, technical details of how Inertia works under the hood, check out the [protocol page](/the-protocol). # The protocol This page contains a detailed specification of the Inertia protocol. Be sure to read the [how it works](/how-it-works) page first for a high-level overview. ## HTML responses The very first request to an Inertia app is just a regular, full-page browser request, with no special Inertia headers or data. For these requests, the server returns a full HTML document. This HTML response includes the site assets (CSS, JavaScript) as well as a root `
` in the page's body. The root `
` serves as a mounting point for the client-side app, and includes a `data-page` attribute with a JSON encoded [page object](#the-page-object) for the initial page. Inertia uses this information to boot your client-side framework and display the initial page component. ```html My app
``` While the initial response is HTML, Inertia does not server-side render the JavaScript page components. ## Inertia responses Once the Inertia app has been booted, all subsequent requests to the site are made via XHR with a `X-Inertia` header set to `true`. This header indicates that the request is being made by Inertia and isn't a standard full-page visit. When the server detects the `X-Inertia` header, instead of responding with a full HTML document, it returns a JSON response with an encoded [page object](#the-page-object). ```json { "component": "Event", "props": { "event": { "id": 80, "title": "Birthday party", "start_date": "2019-06-02", "description": "Come out and celebrate Jonathan's 36th birthday party!" } }, "url": "/events/80", "version": "6b16b94d7c51cbe5b1fa42aac98241d5", "encryptHistory": true, "clearHistory": false } ``` ## The page object Inertia shares data between the server and client via a page object. This object includes the necessary information required to render the page component, update the browser's history state, and track the site's asset version. The page object includes the following four properties: 1. **component:** The name of the JavaScript page component. 2. **props:** The page props (data). 3. **url:** The page URL. 4. **version:** The current asset version. 5. **encryptHistory:** Whether or not to encrypt the current page's history state. 6. **clearHistory:** Whether or not to clear any encrypted history state. On standard full page visits, the page object is JSON encoded into the `data-page` attribute in the root `
`. On Inertia visits, the page object is returned as the JSON payload. ## Asset versioning One common challenge with single-page apps is refreshing site assets when they've been changed. Inertia makes this easy by optionally tracking the current version of the site's assets. In the event that an asset changes, Inertia will automatically make a full-page visit instead of an XHR visit. The Inertia [page object](#the-page-object) includes a `version` identifier. This version identifier is set server-side and can be a number, string, file hash, or any other value that represents the current "version" of your site's assets, as long as the value changes when the site's assets have been updated. Whenever an Inertia request is made, Inertia will include the current asset version in the `X-Inertia-Version` header. When the server receives the request, it compares the asset version provided in the `X-Inertia-Version` header with the current asset version. This is typically handled in the middleware layer of your server-side framework. If the asset versions are the same, the request simply continues as expected. However, if the asset versions are different, the server immediately returns a `409 Conflict` response, and includes the URL in a `X-Inertia-Location` header. This header is necessary, since server-side redirects may have occurred. This tells Inertia what the final intended destination URL is. Note, `409 Conflict` responses are only sent for `GET` requests, and not for `POST/PUT/PATCH/DELETE` requests. That said, they will be sent in the event that a `GET`redirect occurs after one of these requests. If "flash" session data exists when a `409 Conflict` response occurs, Inertia's server-side framework adapters will automatically reflash this data. You can read more about this on the [asset versioning](/asset-versioning) page. ## Partial reloads When making Inertia requests, the partial reload option allows you to request a subset of the props (data) from the server on subsequent visits to the *same* page component. This can be a helpful performance optimization if it's acceptable that some page data becomes stale. When a partial reload request is made, Inertia includes two additional headers with the request: `X-Inertia-Partial-Data` and `X-Inertia-Partial-Component`. The `X-Inertia-Partial-Data` header is a comma separated list of the desired props (data) keys that should be returned. The `X-Inertia-Partial-Component` header includes the name of the component that is being partially reloaded. This is necessary, since partial reloads only work for requests made to the same page component. If the final destination is different for some reason (eg. the user was logged out and is now on the login page), then no partial reloading will occur. ```json { "component": "Events", "props": { "auth": {...}, // NOT included "categories": [...], // NOT included "events": [...] // included }, "url": "/events/80", "version": "6b16b94d7c51cbe5b1fa42aac98241d5" } ``` # Pages When building applications using Inertia, each page in your application typically has its own controller / route and a corresponding JavaScript component. This allows you to retrieve just the data necessary for that page - no API required. In addition, all of the data needed for the page can be retrieved before the page is ever rendered by the browser, eliminating the need for displaying "loading" states when users visit your application. ## Creating pages Inertia pages are simply JavaScript components. If you have ever written a Vue, React, or Svelte component, you will feel right at home. As you can see in the example below, pages receive data from your application's controllers as props. Vue: ```markup ``` React: ```jsx import Layout from './Layout' import { Head } from '@inertiajs/react' export default function Welcome({ user }) { return (

Welcome

Hello {user.name}, welcome to your first Inertia app!

) } ``` Svelte 4: ```html Welcome

Welcome

Hello {user.name}, welcome to your first Inertia app!

``` Svelte 5: ```html Welcome

Welcome

Hello {user.name}, welcome to your first Inertia app!

``` Given the page above, you can render the page by returning an [Inertia response](/responses) from a controller or route. In this example, let's assume this page is stored at `resources/js/Pages/User/Show.vue``resources/js/Pages/User/Show.jsx``resources/js/Pages/User/Show.svelte`within a Laravel application. Laravel: ```php use Inertia\\Inertia; class UserController extends Controller { public function show(User $user) { return Inertia::render('User/Show', [ 'user' => $user ]); } } ``` If you attempt to render a page that does not exist, the response will typically be a blank screen. To prevent this, you may set the `inertia.ensure_pages_exist` configuration option to `true`. The Laravel adapter will then throw an `Inertia\ComponentNotFoundException` when a page cannot be found. ## Creating layouts While not required, for most projects it makes sense to create a layout component that all of your pages can use. You may have noticed in our page example above that we're wrapping the page content within a `` component. Here's an example of such a component: Vue: ```markup ``` React: ```jsx import { Link } from '@inertiajs/react' export default function Layout({ children }) { return (
Home About Contact
{children}
) } ``` Svelte 4: ```html
Home About Contact
``` Svelte 5: ```html
Home About Contact
{@render children()}
``` As you can see, there is nothing Inertia specific within this template. This is just a typical VueReactSvelte component. ## Persistent layouts While it's simple to implement layouts as children of page components, it forces the layout instance to be destroyed and recreated between visits. This means you cannot have persistent layout state when navigating between pages. For example, maybe you have an audio player on a podcast website that you want to continue playing as users navigate the site. Or, maybe you simply want to maintain the scroll position in your sidebar navigation between page visits. In these situations, the solution is to leverage Inertia's persistent layouts. Vue: ```markup ``` React: ```jsx import Layout from './Layout' const Home = ({ user }) => { return (

Welcome

Hello {user.name}, welcome to your first Inertia app!

) } Home.layout = page => export default Home ``` Svelte 4: ```html

Welcome

Hello {user.name}, welcome to your first Inertia app!

``` Svelte 5: ```html

Welcome

Hello {user.name}, welcome to your first Inertia app!

``` You can also create more complex layout arrangements using nested layouts. Vue: ```markup ``` React: ```jsx import SiteLayout from './SiteLayout' import NestedLayout from './NestedLayout' const Home = ({ user }) => { return (

Welcome

Hello {user.name}, welcome to your first Inertia app!

) } Home.layout = page => ( ) export default Home ``` Svelte 4: ```html

Welcome

Hello {user.name}, welcome to your first Inertia app!

``` Svelte 5: ```html

Welcome

Hello {user.name}, welcome to your first Inertia app!

``` If you're using Vue 3.3+, you can alternatively use [defineOptions](https://vuejs.org/api/sfc-script-setup.html#defineoptions) to define a layout within ` ``` ## Default layouts If you're using persistent layouts, you may find it convenient to define the default page layout in the `resolve()` callback of your application's main JavaScript file. Vue: ```js import Layout from './Layout' createInertiaApp({ resolve: name => { const pages = import.meta.glob('./Pages/**/*.vue', { eager: true }) let page = pages[\`./Pages/\${name}.vue\`] page.default.layout = page.default.layout || Layout return page }, // ... }) ``` React: ```js import Layout from './Layout' createInertiaApp({ resolve: name => { const pages = import.meta.glob('./Pages/**/*.jsx', { eager: true }) let page = pages[\`./Pages/\${name}.jsx\`] page.default.layout = page.default.layout || (page => ) return page }, // ... }) ``` Svelte: ```js import Layout from './Layout' createInertiaApp({ resolve: name => { const pages = import.meta.glob('./Pages/**/*.svelte', { eager: true }) let page = pages[\`./Pages/\${name}.svelte\`] return { default: page.default, layout: page.layout || Layout } }, // ... }) ``` This will automatically set the page layout to `Layout` if a layout has not already been set for that page. You can even go a step further and conditionally set the default page layout based on the page `name`, which is available to the `resolve()` callback. For example, maybe you don't want the default layout to be applied to your public pages. Vue: ```js import Layout from './Layout' createInertiaApp({ resolve: name => { const pages = import.meta.glob('./Pages/**/*.vue', { eager: true }) let page = pages[\`./Pages/\${name}.vue\`] page.default.layout = name.startsWith('Public/') ? undefined : Layout return page }, // ... }) ``` React: ```js import Layout from './Layout' createInertiaApp({ resolve: name => { const pages = import.meta.glob('./Pages/**/*.jsx', { eager: true }) let page = pages[\`./Pages/\${name}.jsx\`] page.default.layout = name.startsWith('Public/') ? undefined : page => return page }, // ... }) ``` Svelte: ```js import Layout from './Layout' createInertiaApp({ resolve: name => { const pages = import.meta.glob('./Pages/**/*.svelte', { eager: true }) let page = pages[\`./Pages/\${name}.svelte\`] return { default: page.default, layout: name.startsWith('Public/') ? undefined : Layout } }, // ... }) ``` # Responses ## Creating responses Creating an Inertia response is simple. To get started, invoke the `Inertia::render()` method within your controller or route, providing both the name of the [JavaScript page component](/pages) that you wish to render, as well as any properties (data) for the page. In the example below, we will pass a single property (`event`) which contains four attributes ( `id`, `title`, `start_date` and `description`) to the `Event/Show` page component. Laravel: ```php use Inertia\\Inertia; class EventsController extends Controller { public function show(Event $event) { return Inertia::render('Event/Show', [ 'event' => $event->only( 'id', 'title', 'start_date', 'description' ), ]); // Alternatively, you can use the inertia() helper... return inertia('Event/Show', [ 'event' => $event->only( 'id', 'title', 'start_date', 'description' ), ]); } } ``` To ensure that pages load quickly, only return the minimum data required for the page. Also, be aware that all data returned from the controllers will be visible client-side, so be sure to omit sensitive information. ## Properties To pass data from the server to your page components, you can use properties. You can pass various types of values as props, including primitive types, arrays, objects, and several Laravel-specific types that are automatically resolved: Laravel: ```php use App\\Models\\User; use Illuminate\\Http\\Resources\\Json\\JsonResource; Inertia::render('Dashboard', [ // Primitive values 'title' => 'Dashboard', 'count' => 42, 'active' => true, // Arrays and objects 'settings' => ['theme' => 'dark', 'notifications' => true], // Arrayable objects (Collections, Models, etc.) 'user' => auth()->user(), // Eloquent model 'users' => User::all(), // Eloquent collection // API Resources 'profile' => new UserResource(auth()->user()), // Responsable objects 'data' => new JsonResponse(['key' => 'value']), // Closures 'timestamp' => fn() => now()->timestamp, ]); ``` Arrayable objects like Eloquent models and collections are automatically converted using their `toArray()` method. Responsable objects like API resources and JSON responses are resolved through their `toResponse()` method. ## ProvidesInertiaProperty interface When passing props to your components, you may want to create custom classes that can transform themselves into the appropriate data format. While Laravel's `Arrayable` interface simply converts objects to arrays, Inertia offers the more powerful `ProvidesInertiaProperty` interface for context-aware transformations. This interface requires a `toInertiaProperty` method that receives a `PropertyContext` object containing the property key (`$context->key`), all props for the page (`$context->props`), and the request instance (`$context->request`). Laravel: ```php use Inertia\\PropertyContext; use Inertia\\ProvidesInertiaProperty; class UserAvatar implements ProvidesInertiaProperty { public function __construct(protected User $user, protected int $size = 64) {} public function toInertiaProperty(PropertyContext $context): mixed { return $this->user->avatar ? Storage::url($this->user->avatar) : "https://ui-avatars.com/api/?name={$this->user->name}&size={$this->size}"; } } ``` Once defined, you can use this class directly as a prop value. Laravel: ```php Inertia::render('Profile', [ 'user' => $user, 'avatar' => new UserAvatar($user, 128), ]); ``` The `PropertyContext` gives you access to the property key, which enables powerful patterns like merging with shared data. Laravel: ```php use Inertia\\Inertia; use Inertia\\PropertyContext; use Inertia\\ProvidesInertiaProperty; class MergeWithShared implements ProvidesInertiaProperty { public function __construct(protected array $items = []) {} public function toInertiaProperty(PropertyContext $context): mixed { // Access the property key to get shared data $shared = Inertia::getShared($context->key, []); // Merge with the new items return array_merge($shared, $this->items); } } // Usage Inertia::share('notifications', ['Welcome back!']); return Inertia::render('Dashboard', [ 'notifications' => new MergeWithShared(['New message received']), // Result: ['Welcome back!', 'New message received'] ]); ``` ## ProvidesInertiaProperties interface In some situations you may want to group related props together for reusability across different pages. You can accomplish this by implementing the `ProvidesInertiaProperties` interface. This interface requires a `toInertiaProperties` method that returns an array of key-value pairs. The method receives a `RenderContext` object containing the component name (`$context->component`) and request instance (`$context->request`). Laravel: ```php use App\\Models\\User; use Illuminate\\Container\\Attributes\\CurrentUser; use Inertia\\RenderContext; use Inertia\\ProvidesInertiaProperties; class UserPermissions implements ProvidesInertiaProperties { public function __construct(#[CurrentUser] protected User $user) {} public function toInertiaProperties(RenderContext $context): array { return [ 'canEdit' => $this->user->can('edit'), 'canDelete' => $this->user->can('delete'), 'canPublish' => $this->user->can('publish'), 'isAdmin' => $this->user->hasRole('admin'), ]; } } ``` You can use these prop classes directly in the `render()` and `with()` methods. Laravel: ```php public function index(UserPermissions $permissions) { return Inertia::render('UserProfile', $permissions); // or... return Inertia::render('UserProfile')->with($permissions); } ``` You can also combine multiple prop classes with other props in an array: Laravel: ```php public function index(UserPermissions $permissions) { return Inertia::render('UserProfile', [ 'user' => auth()->user(), $permissions, ]); // or using method chaining... return Inertia::render('UserProfile') ->with('user', auth()->user()) ->with($permissions); } ``` ## Root template data There are situations where you may want to access your prop data in your application's root Blade template. For example, you may want to add a meta description tag, Twitter card meta tags, or Facebook Open Graph meta tags. You can access this data via the `$page` variable. Laravel: ```markup ``` Sometimes you may even want to provide data to the root template that will not be sent to your JavaScript page component. This can be accomplished by invoking the `withViewData` method. Laravel: ```php return Inertia::render('Event', ['event' => $event]) ->withViewData(['meta' => $event->meta]); ``` After invoking the `withViewData` method, you can access the defined data as you would typically access a Blade template variable. Laravel: ```markup ``` ## Maximum response size To enable client-side history navigation, all Inertia server responses are stored in the browser's history state. However, keep in mind that some browsers impose a size limit on how much data can be saved within the history state. For example, [Firefox](https://developer.mozilla.org/en-US/docs/Web/API/History/pushState) has a size limit of 16 MiB and throws a `NS_ERROR_ILLEGAL_VALUE` error if you exceed this limit. Typically, this is much more data than you'll ever practically need when building applications. # Redirects When making a non-GET Inertia request manually or via a `` element, you should ensure that you always respond with a proper Inertia redirect response. For example, if your controller is creating a new user, your "store" endpoint should return a redirect back to a standard `GET` endpoint, such as your user "index" page. Inertia will automatically follow this redirect and update the page accordingly. Laravel: ```php class UsersController extends Controller { public function index() { return Inertia::render('Users/Index', [ 'users' => User::all(), ]); } public function store(Request $request) { User::create( $request->validate([ 'name' => ['required', 'max:50'], 'email' => ['required', 'max:50', 'email'], ]) ); return to_route('users.index'); } } ``` ## 303 response code When redirecting after a `PUT`, `PATCH`, or `DELETE` request, you must use a `303` response code, otherwise the subsequent request will not be treated as a `GET`request. A `303` redirect is very similar to a `302` redirect; however, the follow-up request is explicitly changed to a `GET` request. If you're using one of our official server-side adapters, all redirects will automatically be converted to `303` redirects. ## External redirects Sometimes it's necessary to redirect to an external website, or even another non-Inertia endpoint in your app while handling an Inertia request. This can be accomplished using a server-side initiated `window.location` visit via the `Inertia::location()` method. Laravel: ```php return Inertia::location($url); ``` The `Inertia::location()` method will generate a `409 Conflict` response and include the destination URL in the `X-Inertia-Location` header. When this response is received client-side, Inertia will automatically perform a `window.location = url` visit. # Routing ## Defining routes When using Inertia, all of your application's routes are defined server-side. This means that you don't need Vue Router or React Router. Instead, you can simply define Laravel routes and return [Inertia responses](/responses) from those routes. ## Shorthand routes If you have a [page](/pages) that doesn't need a corresponding controller method, like an "FAQ" or "about" page, you can route directly to a component via the `Route::inertia()` method. Laravel: ```php Route::inertia('/about', 'About'); ``` ## Generating URLs Some server-side frameworks allow you to generate URLs from named routes. However, you will not have access to those helpers client-side. Here are a couple ways to still use named routes with Inertia. The first option is to generate URLs server-side and include them as props. Notice in this example how we're passing the `edit_url` and `create_url` to the `Users/Index` component. Laravel: ```php class UsersController extends Controller { public function index() { return Inertia::render('Users/Index', [ 'users' => User::all()->map(function ($user) { return [ 'id' => $user->id, 'name' => $user->name, 'email' => $user->email, 'edit_url' => route('users.edit', $user), ]; }), 'create_url' => route('users.create'), ]); } } ``` However, when using Laravel, the [Ziggy](https://github.com/tighten/ziggy) library can make your named, server-side routes available to you via a global `route()` function. In fact, if you are developing an application using one of Laravel's [starter kits](https://laravel.com/docs/starter-kits), Ziggy is already configured for you. If you're using the Vue plugin included with Ziggy, you may use the `route()`function directly in your templates. ```html Create User ``` When [server-side rendering](/server-side-rendering) is enabled, you may pass an options object to the Ziggy plugin in your `ssr.js` file. This should include the route definitions and current location. ```js .use(ZiggyVue, { ...page.props.ziggy, location: new URL(page.props.ziggy.location), }); ``` ## Customizing the Page URL The [page object](/the-protocol#the-page-object) includes a `url` that represents the current page's URL. By default, the Laravel adapter resolves this using the `fullUrl()` method on the `Request` instance, but strips the scheme and host so the result is a relative URL. If you need to customize how the URL is resolved, you may provide a resolver within the `urlResolver` method of the Inertia `HandleInertiaRequests` middleware. ```php class HandleInertiaRequests extends Middleware { public function urlResolver() { return function (Request $request) { // Return the URL for the request... }; } } ``` Alternatively, you may define the resolver using the `Inertia::resolveUrlUsing()` method. ```php Inertia::resolveUrlUsing(function (Request $request) { // Return the URL for the request... }); ``` # Title & meta Since Inertia powered JavaScript apps are rendered within the document ``, they are unable to render markup to the document ``, as it's outside of their scope. To help with this, Inertia ships with a `` component which can be used to set the page `'}`, `{'<meta></meta>'}` tags, and other `{' elements.` The `<Head>'}` component will only replace `{'elements that are not in your server-side root template.` The `<Head>` component is not available in the Svelte adapter, as Svelte already ships with its own `<svelte:head>` component. ## Head component To add `<head>'}` elements to your page, use the `{' component. Within thiscomponent, you can include the elements that you wish to add to the document `<head>`.` Vue: ```jsx import { Head } from '@inertiajs/vue3' <Head> <title>Your page title ``` React: ```jsx import { Head } from '@inertiajs/react' Your page title ``` Svelte: ```html Your page title ``` ## Title shorthand If you only need to add a `'}` to the document `{', you may simply passthe title as a prop to the `<Head>` component.` Vue: ```jsx import { Head } from '@inertiajs/vue3' <Head title="Your page title" /> ``` React: ```jsx import { Head } from '@inertiajs/react' <Head title="Your page title" /> ``` Svelte: ```js // Not supported ``` ## Title callback You can globally modify the page `<title>` using the `title` callback in the `createInertiaApp` setup method. Typically, this method is invoked in your application's main JavaScript file. A common use case for the title callback is automatically adding an app name before or after each page title. ```js createInertiaApp({ title: title => \ ``` After defining the `title` callback, the callback will automatically be invoked when you set a title using the `<Head>` component. Vue: ```jsx import { Head } from '@inertiajs/vue3' <Head title="Home"> ``` React: ```jsx import { Head } from '@inertiajs/react' <Head title="Home"> ``` Svelte: ```js // Not supported ``` Which, in this example, will result in the following `<title>` tag. ```html <title>Home - My App ``` The `title` callback will also be invoked when you set the title using a `` tag within your `<Head>` component. Vue: ```jsx import { Head } from '@inertiajs/vue3' <Head> <title>Home ``` React: ```jsx import { Head } from '@inertiajs/react' Home ``` Svelte: ```js // Not supported ``` ## Multiple Head instances It's possible to have multiple instances of the `` component throughout your application. For example, your layout can set some default `` elements, and then your individual pages can override those defaults. Vue: ```jsx // Layout.vue import { Head } from '@inertiajs/vue3' My app // About.vue import { Head } from '@inertiajs/vue3' About - My app ``` React: ```jsx // Layout.js import { Head } from '@inertiajs/react' My app // About.js import { Head } from '@inertiajs/react' About - My app ``` Svelte: ```js // Not supported ``` Inertia will only ever render one `` tag; however, all other tags will be stacked since it's valid to have multiple instances of them. To avoid duplicate tags in your `<head>`, you can use the `head-key` property, which will make sure the tag is only rendered once. This is illustrated in the example above for the `<meta name="description">` tag. The code example above will render the following HTML. ```html <head> <link rel="icon" type="image/svg+xml" href="/favicon.svg" /> <title>About - My app ``` ## Head extension When building a real application, it can sometimes be helpful to create a custom head component that extends Inertia's `` component. This gives you a place to set app-wide defaults, such as appending the app name to the page title. Vue: ```markup \ ``` React: ```jsx // AppHead.js import { Head } from '@inertiajs/react' const Site = ({ title, children }) => { return ( {title ? \`\${title} - My App\` : 'My App'} {children} ) } export default Site ``` Svelte: ```js // Not supported ``` Once you have created the custom component, you can just start using it in your pages. Vue: ```jsx import AppHead from './AppHead' ``` React: ```jsx import AppHead from './AppHead' ``` Svelte: ```js // Not supported ``` # Links To create links to other pages within an Inertia app, you will typically use the Inertia ``component. This component is a light wrapper around a standard anchor `` link that intercepts click events and prevents full page reloads. This is [how Inertia provides a single-page app experience](/how-it-works) once your application has been loaded. ## Creating links To create an Inertia link, use the Inertia `` component. Any attributes you provide to this component will be proxied to the underlying HTML tag. Vue: ```jsx import { Link } from '@inertiajs/vue3' Home ``` React: ```jsx import { Link } from '@inertiajs/react' Home ``` Svelte: ```jsx import { inertia, Link } from '@inertiajs/svelte' Home Home ``` By default, Inertia renders links as anchor `` elements. However, you can change the tag using the `as` prop. Vue: ```jsx import { Link } from '@inertiajs/vue3' Logout // Renders as... ``` React: ```jsx import { Link } from '@inertiajs/react' Logout // Renders as... ``` Svelte: ```jsx import { Link } from '@inertiajs/svelte' Logout // Renders as... ``` Creating `POST`/`PUT`/`PATCH`/ `DELETE` anchor `` links is discouraged as it causes "Open Link in New Tab / Window" accessibility issues. The component automatically renders a{` `} ` Logout ``` ## Wayfinder When using [Wayfinder](https://github.com/laravel/wayfinder) in conjunction with the `Link`component, you can simply pass the resulting object directly to the `href` prop. The `Link` will infer the HTTP method and URL directly from the Wayfinder object. Vue: ```jsx import { Link } from '@inertiajs/vue3' import { show } from 'App/Http/Controllers/UserController' John Doe ``` React: ```jsx import { Link } from '@inertiajs/react' import { show } from 'App/Http/Controllers/UserController' John Doe ``` Svelte: ```jsx import { inertia, Link } from '@inertiajs/svelte' import { show } from 'App/Http/Controllers/UserController' John Doe ``` ## Data When making `POST` or `PUT` requests, you may wish to add additional data to the request. You can accomplish this using the `data` prop. The provided data can be an `object` or `FormData` instance. Vue: ```jsx import { Link } from '@inertiajs/vue3' Save ``` React: ```jsx import { Link } from '@inertiajs/react' Save ``` Svelte: ```jsx import { inertia, Link } from '@inertiajs/svelte' Save ``` ## Custom headers The `headers` prop allows you to add custom headers to an Inertia link. However, the headers Inertia uses internally to communicate its state to the server take priority and therefore cannot be overwritten. Vue: ```jsx import { Link } from '@inertiajs/vue3' Save ``` React: ```jsx import { Link } from '@inertiajs/react' Save ``` Svelte: ```jsx import { inertia, Link } from '@inertiajs/svelte' Save ``` ## Browser history The `replace` prop allows you to specify the browser's history behavior. By default, page visits push (new) state (`window.history.pushState`) into the history; however, it's also possible to replace state (`window.history.replaceState`) by setting the `replace` prop to `true`. This will cause the visit to replace the current history state instead of adding a new history state to the stack. Vue: ```jsx import { Link } from '@inertiajs/vue3' Home ``` React: ```jsx import { Link } from '@inertiajs/react' Home ``` Svelte: ```jsx import { inertia, Link } from '@inertiajs/svelte' Home Home ``` ## State preservation You can preserve a page component's local state using the `preserve-state` prop. This will prevent a page component from fully re-rendering. The `preserve-state` prop is especially helpful on pages that contain forms, since you can avoid manually repopulating input fields and can also maintain a focused input. Vue: ```jsx import { Link } from '@inertiajs/vue3' Search ``` React: ```jsx import { Link } from '@inertiajs/react' Search ``` Svelte: ```jsx import { inertia, Link } from '@inertiajs/svelte' Search ``` ## Scroll preservation You can use the `preserveScroll` prop to prevent Inertia from automatically resetting the scroll position when making a page visit. Vue: ```jsx import { Link } from '@inertiajs/vue3' Home ``` React: ```jsx import { Link } from '@inertiajs/react' Home ``` Svelte: ```jsx import { inertia, Link } from '@inertiajs/svelte' Home Home ``` For more information on managing scroll position, check out the documentation on [scroll management](/scroll-management). ## Partial reloads The `only` prop allows you to specify that only a subset of a page's props (data) should be retrieved from the server on subsequent visits to that page. Vue: ```jsx import { Link } from '@inertiajs/vue3' Show active ``` React: ```jsx import { Link } from '@inertiajs/react' Show active ``` Svelte: ```jsx import { inertia, Link } from '@inertiajs/svelte' Show active Show active ``` For more information on this topic, check out the complete documentation on [partial reloads](/partial-reloads). ## Active states It's common to set an active state for navigation links based on the current page. This can be accomplished when using Inertia by inspecting the `page` object and doing string comparisons against the `page.url` and `page.component` properties. Vue: ```jsx import { Link } from '@inertiajs/vue3' // URL exact match... Users // Component exact match... Users // URL starts with (/users, /users/create, /users/1, etc.)... Users // Component starts with (Users/Index, Users/Create, Users/Show, etc.)... Users ``` React: ```jsx import { usePage } from '@inertiajs/react' const { url, component } = usePage() // URL exact match... Users // Component exact match... Users // URL starts with (/users, /users/create, /users/1, etc.)... Users // Component starts with (Users/Index, Users/Create, Users/Show, etc.)... Users ``` Svelte: ```jsx import { inertia, Link, page } from '@inertiajs/svelte' // URL exact match... Users // Component exact match... Users // URL starts with (/users, /users/create, /users/1, etc.)... Users // Component starts with (Users/Index, Users/Create, Users/Show, etc.)... Users ``` You can perform exact match comparisons (`===`), `startsWith()` comparisons (useful for matching a subset of pages), or even more complex comparisons using regular expressions. Using this approach, you're not limited to just setting class names. You can use this technique to conditionally render any markup on active state, such as different link text or even an SVG icon that represents the link is active. ## Data loading attribute While a link is making an active request, a `data-loading` attribute is added to the link element. This allows you to style the link while it's in a loading state. The attribute is removed once the request is complete. # Manual visits In addition to [creating links](/links), it's also possible to manually make Inertia visits / requests programmatically via JavaScript. This is accomplished via the `router.visit()` method. Vue: ```js import { router } from '@inertiajs/vue3' router.visit(url, { method: 'get', data: {}, replace: false, preserveState: false, preserveScroll: false, only: [], except: [], headers: {}, errorBag: null, forceFormData: false, queryStringArrayFormat: 'brackets', async: false, showProgress: true, fresh: false, reset: [], preserveUrl: false, prefetch: false, onCancelToken: cancelToken => {}, onCancel: () => {}, onBefore: visit => {}, onStart: visit => {}, onProgress: progress => {}, onSuccess: page => {}, onError: errors => {}, onFinish: visit => {}, onPrefetching: () => {}, onPrefetched: () => {}, }) ``` React: ```js import { router } from '@inertiajs/react' router.visit(url, { method: 'get', data: {}, replace: false, preserveState: false, preserveScroll: false, only: [], except: [], headers: {}, errorBag: null, forceFormData: false, queryStringArrayFormat: 'brackets', async: false, showProgress: true, fresh: false, reset: [], preserveUrl: false, prefetch: false, onCancelToken: cancelToken => {}, onCancel: () => {}, onBefore: visit => {}, onStart: visit => {}, onProgress: progress => {}, onSuccess: page => {}, onError: errors => {}, onFinish: visit => {}, onPrefetching: () => {}, onPrefetched: () => {}, }) ``` Svelte: ```js import { router } from '@inertiajs/svelte' router.visit(url, { method: 'get', data: {}, replace: false, preserveState: false, preserveScroll: false, only: [], except: [], headers: {}, errorBag: null, forceFormData: false, queryStringArrayFormat: 'brackets', async: false, showProgress: true, fresh: false, reset: [], preserveUrl: false, prefetch: false, onCancelToken: cancelToken => {}, onCancel: () => {}, onBefore: visit => {}, onStart: visit => {}, onProgress: progress => {}, onSuccess: page => {}, onError: errors => {}, onFinish: visit => {}, onPrefetching: () => {}, onPrefetched: () => {}, }) ``` However, it's generally more convenient to use one of Inertia's shortcut request methods. These methods share all the same options as `router.visit()`. Vue: ```js import { router } from '@inertiajs/vue3' router.get(url, data, options) router.post(url, data, options) router.put(url, data, options) router.patch(url, data, options) router.delete(url, options) router.reload(options) // Uses the current URL ``` React: ```js import { router } from '@inertiajs/react' router.get(url, data, options) router.post(url, data, options) router.put(url, data, options) router.patch(url, data, options) router.delete(url, options) router.reload(options) // Uses the current URL ``` Svelte: ```js import { router } from '@inertiajs/svelte' router.get(url, data, options) router.post(url, data, options) router.put(url, data, options) router.patch(url, data, options) router.delete(url, options) router.reload(options) // Uses the current URL ``` The `reload()` method is a convenient, shorthand method that automatically visits the current page with `preserveState` and `preserveScroll` both set to `true`, making it the perfect method to invoke when you just want to reload the current page's data. ## Method When making manual visits, you may use the `method` option to set the request's HTTP method to `get`, `post`, `put`, `patch` or `delete`. The default method is `get`. Vue: ```js import { router } from '@inertiajs/vue3' router.visit(url, { method: 'post' }) ``` React: ```js import { router } from '@inertiajs/react' router.visit(url, { method: 'post' }) ``` Svelte: ```js import { router } from '@inertiajs/svelte' router.visit(url, { method: 'post' }) ``` Uploading files via `put` or `patch` is not supported in Laravel. Instead, make the request via `post`, including a `_method` field set to `put` or `patch`. This is called [form method spoofing](https://laravel.com/docs/routing#form-method-spoofing). ## Wayfinder When using [Wayfinder](https://github.com/laravel/wayfinder), you can pass the resulting object directly to any router method. The router will infer the HTTP method and URL from the Wayfinder object. Vue: ```js import { router } from '@inertiajs/vue3' import { show } from 'App/Http/Controllers/UserController' router.visit(show(1)) router.post(store()) router.delete(destroy(1)) ``` React: ```js import { router } from '@inertiajs/react' import { show } from 'App/Http/Controllers/UserController' router.visit(show(1)) router.post(store()) router.delete(destroy(1)) ``` Svelte: ```js import { router } from '@inertiajs/svelte' import { show } from 'App/Http/Controllers/UserController' router.visit(show(1)) router.post(store()) router.delete(destroy(1)) ``` If you provide both a Wayfinder object and specify the `method` option, the `method` option will take precedence. Vue: ```js import { router } from '@inertiajs/vue3' import { update } from 'App/Http/Controllers/UserController' router.visit(update(1), { method: 'patch' }) ``` React: ```js import { router } from '@inertiajs/react' import { update } from 'App/Http/Controllers/UserController' router.visit(update(1), { method: 'patch' }) ``` Svelte: ```js import { router } from '@inertiajs/svelte' import { update } from 'App/Http/Controllers/UserController' router.visit(update(1), { method: 'patch' }) ``` ## Data You may use the `data` option to add data to the request. Vue: ```js import { router } from '@inertiajs/vue3' router.visit('/users', { method: 'post', data: { name: 'John Doe', email: 'john.doe@example.com', }, }) ``` React: ```js import { router } from '@inertiajs/react' router.visit('/users', { method: 'post', data: { name: 'John Doe', email: 'john.doe@example.com', }, }) ``` Svelte: ```js import { router } from '@inertiajs/svelte' router.visit('/users', { method: 'post', data: { name: 'John Doe', email: 'john.doe@example.com', }, }) ``` For convenience, the `get()`, `post()`, `put()`, and `patch()`methods all accept `data` as their second argument. Vue: ```js import { router } from '@inertiajs/vue3' router.post('/users', { name: 'John Doe', email: 'john.doe@example.com', }) ``` React: ```js import { router } from '@inertiajs/react' router.post('/users', { name: 'John Doe', email: 'john.doe@example.com', }) ``` Svelte: ```js import { router } from '@inertiajs/svelte' router.post('/users', { name: 'John Doe', email: 'john.doe@example.com', }) ``` ## Custom headers The `headers` option allows you to add custom headers to a request. Vue: ```js import { router } from '@inertiajs/vue3' router.post('/users', data, { headers: { 'Custom-Header': 'value', }, }) ``` React: ```js import { router } from '@inertiajs/react' router.post('/users', data, { headers: { 'Custom-Header': 'value', }, }) ``` Svelte: ```js import { router } from '@inertiajs/svelte' router.post('/users', data, { headers: { 'Custom-Header': 'value', }, }) ``` The headers Inertia uses internally to communicate its state to the server take priority and therefore cannot be overwritten. ## File uploads When making visits / requests that include files, Inertia will automatically convert the request data into a `FormData` object. If you would like the request to always use a `FormData` object, you may use the `forceFormData` option. Vue: ```js import { router } from '@inertiajs/vue3' router.post('/companies', data, { forceFormData: true, }) ``` React: ```js import { router } from '@inertiajs/react' router.post('/companies', data, { forceFormData: true, }) ``` Svelte: ```js import { router } from '@inertiajs/svelte' router.post('/companies', data, { forceFormData: true, }) ``` For more information on uploading files, check out the dedicated [file uploads](/file-uploads)documentation. ## Browser history When making visits, Inertia automatically adds a new entry into the browser history. However, it's also possible to replace the current history entry by setting the `replace` option to `true`. Vue: ```js import { router } from '@inertiajs/vue3' router.get('/users', { search: 'John' }, { replace: true }) ``` React: ```js import { router } from '@inertiajs/react' router.get('/users', { search: 'John' }, { replace: true }) ``` Svelte: ```js import { router } from '@inertiajs/svelte' router.get('/users', { search: 'John' }, { replace: true }) ``` Visits made to the same URL automatically set `replace` to `true`. ## Client side visits You can use the `router.push` and `router.replace` method to make client-side visits. This method is useful when you want to update the browser's history without making a server request. Vue: ```js import { router } from '@inertiajs/vue3' router.push({ url: '/users', component: 'Users', props: { search: 'John' }, clearHistory: false, encryptHistory: false, preserveScroll: false, preserveState: false, errorBag: null, onSuccess: (page) => {}, onError: (errors) => {}, onFinish: (visit) => {}, }) ``` React: ```js import { router } from '@inertiajs/react' router.push({ url: '/users', component: 'Users', props: { search: 'John' }, clearHistory: false, encryptHistory: false, preserveScroll: false, preserveState: false, errorBag: null, onSuccess: (page) => {}, onError: (errors) => {}, onFinish: (visit) => {}, }) ``` Svelte: ```js import { router } from '@inertiajs/svelte' router.push({ url: '/users', component: 'Users', props: { search: 'John' }, clearHistory: false, encryptHistory: false, preserveScroll: false, preserveState: false, errorBag: null, onSuccess: (page) => {}, onError: (errors) => {}, onFinish: (visit) => {}, }) ``` All of the parameters are optional. By default, all passed paramaters (except `errorBag`) will be merged with the current page. This means you are responsible for overriding the current page's URL, component, and props. If you need access to the current page's props, you can pass a function to the props option. This function will receive the current page's props as an argument and should return the new props. The `errorBag` option allows you to specify which error bag to use when handling validation errors in the `onError` callback. Vue: ```js import { router } from '@inertiajs/vue3' router.push({ url: '/users', component: 'Users' }) router.replace({ props: (currentProps) => ({ ...currentProps, search: 'John' }) }) ``` React: ```js import { router } from '@inertiajs/react' router.push({ url: '/users', component: 'Users' }) router.replace({ props: (currentProps) => ({ ...currentProps, search: 'John' }) }) ``` Svelte: ```js import { router } from '@inertiajs/svelte' router.push({ url: '/users', component: 'Users' }) router.replace({ props: (currentProps) => ({ ...currentProps, search: 'John' }) }) ``` Make sure that any route you push on the client side is also defined on the server side. If the user refreshes the page, the server will need to know how to render the page. ## State preservation By default, page visits to the same page create a fresh page component instance. This causes any local state, such as form inputs, scroll positions, and focus states to be lost. However, in some situations, it's necessary to preserve the page component state. For example, when submitting a form, you need to preserve your form data in the event that form validation fails on the server. For this reason, the `post`, `put`, `patch`, `delete`, and `reload` methods all set the `preserveState` option to `true` by default. You can instruct Inertia to preserve the component's state when using the `get` method by setting the `preserveState` option to `true`. Vue: ```js import { router } from '@inertiajs/vue3' router.get('/users', { search: 'John' }, { preserveState: true }) ``` React: ```js import { router } from '@inertiajs/react' router.get('/users', { search: 'John' }, { preserveState: true }) ``` Svelte: ```js import { router } from '@inertiajs/svelte' router.get('/users', { search: 'John' }, { preserveState: true }) ``` If you'd like to only preserve state if the response includes validation errors, set the `preserveState` option to "errors". Vue: ```js import { router } from '@inertiajs/vue3' router.get('/users', { search: 'John' }, { preserveState: 'errors' }) ``` React: ```js import { router } from '@inertiajs/react' router.get('/users', { search: 'John' }, { preserveState: 'errors' }) ``` Svelte: ```js import { router } from '@inertiajs/svelte' router.get('/users', { search: 'John' }, { preserveState: 'errors' }) ``` You can also lazily evaluate the `preserveState` option based on the response by providing a callback. Vue: ```js import { router } from '@inertiajs/vue3' router.post('/users', data, { preserveState: (page) => page.props.someProp === 'value', }) ``` React: ```js import { router } from '@inertiajs/react' router.post('/users', data, { preserveState: (page) => page.props.someProp === 'value', }) ``` Svelte: ```js import { router } from '@inertiajs/svelte' router.post('/users', data, { preserveState: (page) => page.props.someProp === 'value', }) ``` ## Scroll preservation When navigating between pages, Inertia mimics default browser behavior by automatically resetting the scroll position of the document body (as well as any [scroll regions](/scroll-management#scroll-regions)you've defined) back to the top of the page. You can disable this behavior by setting the `preserveScroll` option to `true`. Vue: ```js import { router } from '@inertiajs/vue3' router.visit(url, { preserveScroll: true }) ``` React: ```js import { router } from '@inertiajs/react' router.visit(url, { preserveScroll: true }) ``` Svelte: ```js import { router } from '@inertiajs/svelte' router.visit(url, { preserveScroll: true }) ``` If you'd like to only preserve the scroll position if the response includes validation errors, set the `preserveScroll` option to "errors". Vue: ```js import { router } from '@inertiajs/vue3' router.visit(url, { preserveScroll: 'errors' }) ``` React: ```js import { router } from '@inertiajs/react' router.visit(url, { preserveScroll: 'errors' }) ``` Svelte: ```js import { router } from '@inertiajs/svelte' router.visit(url, { preserveScroll: 'errors' }) ``` You can also lazily evaluate the `preserveScroll` option based on the response by providing a callback. Vue: ```js import { router } from '@inertiajs/vue3' router.post('/users', data, { preserveScroll: (page) => page.props.someProp === 'value', }) ``` React: ```js import { router } from '@inertiajs/react' router.post('/users', data, { preserveScroll: (page) => page.props.someProp === 'value', }) ``` Svelte: ```js import { router } from '@inertiajs/svelte' router.post('/users', data, { preserveScroll: (page) => page.props.someProp === 'value', }) ``` For more information regarding this feature, please consult the [scroll management](/scroll-management) documentation. ## Partial reloads The `only` option allows you to request a subset of the props (data) from the server on subsequent visits to the same page, thus making your application more efficient since it does not need to retrieve data that the page is not interested in refreshing. Vue: ```js import { router } from '@inertiajs/vue3' router.get('/users', { search: 'John' }, { only: ['users'] }) ``` React: ```js import { router } from '@inertiajs/react' router.get('/users', { search: 'John' }, { only: ['users'] }) ``` Svelte: ```js import { router } from '@inertiajs/svelte' router.get('/users', { search: 'John' }, { only: ['users'] }) ``` For more information on this feature, please consult the [partial reloads](/partial-reloads)documentation. ## Visit cancellation You can cancel a visit using a cancel token, which Inertia automatically generates and provides via the `onCancelToken()` callback prior to making the visit. Vue: ```js import { router } from '@inertiajs/vue3' router.post('/users', data, { onCancelToken: (cancelToken) => (this.cancelToken = cancelToken), }) // Cancel the visit... this.cancelToken.cancel() ``` React: ```js import { router } from '@inertiajs/react' router.post('/users', data, { onCancelToken: (cancelToken) => (this.cancelToken = cancelToken), }) // Cancel the visit... this.cancelToken.cancel() ``` Svelte: ```js import { router } from '@inertiajs/svelte' router.post('/users', data, { onCancelToken: (cancelToken) => (this.cancelToken = cancelToken), }) // Cancel the visit... this.cancelToken.cancel() ``` The `onCancel()` and `onFinish()` event callbacks will be executed when a visit is cancelled. ## Event callbacks In addition to Inertia's [global events](/events), Inertia also provides a number of per-visit event callbacks. Vue: ```js import { router } from '@inertiajs/vue3' router.post('/users', data, { onBefore: (visit) => {}, onStart: (visit) => {}, onProgress: (progress) => {}, onSuccess: (page) => {}, onError: (errors) => {}, onCancel: () => {}, onFinish: visit => {}, onPrefetching: () => {}, onPrefetched: () => {}, }) ``` React: ```js import { router } from '@inertiajs/react' router.post('/users', data, { onBefore: (visit) => {}, onStart: (visit) => {}, onProgress: (progress) => {}, onSuccess: (page) => {}, onError: (errors) => {}, onCancel: () => {}, onFinish: visit => {}, onPrefetching: () => {}, onPrefetched: () => {}, }) ``` Svelte: ```js import { router } from '@inertiajs/svelte' router.post('/users', data, { onBefore: (visit) => {}, onStart: (visit) => {}, onProgress: (progress) => {}, onSuccess: (page) => {}, onError: (errors) => {}, onCancel: () => {}, onFinish: visit => {}, onPrefetching: () => {}, onPrefetched: () => {}, }) ``` Returning `false` from the `onBefore()` callback will cause the visit to be cancelled. Vue: ```js import { router } from '@inertiajs/vue3' router.delete(\`/users/\${user.id}\ ``` React: ```js import { router } from '@inertiajs/react' router.delete(\`/users/\${user.id}\ ``` Svelte: ```js import { router } from '@inertiajs/svelte' router.delete(\`/users/\${user.id}\ ``` It's also possible to return a promise from the `onSuccess()` and `onError()` callbacks. When doing so, the "finish" event will be delayed until the promise has resolved. Vue: ```js import { router } from '@inertiajs/vue3' router.post(url, { onSuccess: () => { return Promise.all([ this.firstTask(), this.secondTask() ]) } onFinish: visit => { // Not called until firstTask() and secondTask() have finished }, }) ``` React: ```js import { router } from '@inertiajs/react' router.post(url, { onSuccess: () => { return Promise.all([ this.firstTask(), this.secondTask() ]) } onFinish: visit => { // Not called until firstTask() and secondTask() have finished }, }) ``` Svelte: ```js import { router } from '@inertiajs/svelte' router.post(url, { onSuccess: () => { return Promise.all([ this.firstTask(), this.secondTask() ]) } onFinish: visit => { // Not called until firstTask() and secondTask() have finished }, }) ``` # Forms Inertia provides two primary ways to build forms: the `
` component and the `useForm` helper. Both integrate with your server-side framework's validation and handle form submissions without full page reloads. ## Form component Inertia provides a `` component that behaves much like a classic HTML form, but uses Inertia under the hood to avoid full page reloads. This is the simplest way to get started with forms in Inertia. Vue: ```markup ``` React: ```jsx import { Form } from '@inertiajs/react' export default () => (
) ``` Svelte: ```html
``` Just like a traditional HTML form, there is no need to attach a `v-model`an `onChange` handler a `bind:`to your input fields, just give each input a `name` attribute and a `defaultValue` (if applicable) and the `Form` component will handle the data submission for you. The component also supports nested data structures, file uploads, and dotted key notation. Vue: ```markup
``` React: ```jsx
``` Svelte: ```html
``` You can pass a `transform` prop to modify the form data before submission. This is useful for injecting additional fields or transforming existing data, although hidden inputs work too. Vue: ```markup
``` React: ```jsx
({ ...data, user_id: 123 })} \>
``` Svelte: ```html
({ ...data, user_id: 123 })} \>
``` ### Wayfinder When using [Wayfinder](https://github.com/laravel/wayfinder), you can pass the resulting object directly to the `action` prop. The Form component will infer the HTTP method and URL from the Wayfinder object. Vue: ```markup ``` React: ```jsx import { Form } from '@inertiajs/react' import { store } from 'App/Http/Controllers/UserController' export default () => (
) ``` Svelte: ```html
``` ### Checkbox inputs When working with checkboxes, you may want to add an explicit `value` attribute such as `value="1"`. Without a value attribute, checked checkboxes will submit as `"on"`, which some server-side validation rules may not recognize as a proper boolean value. ### Slot props The `
` component exposes reactive state and helper methods through its default slot, giving you access to form processing state, errors, and utility functions. Vue: ```markup
{{ errors.name }}
User created successfully!
``` React: ```jsx
{({ errors, hasErrors, processing, progress, wasSuccessful, recentlySuccessful, setError, clearErrors, resetAndClearErrors, defaults, isDirty, reset, submit, }) => ( {errors.name &&
{errors.name}
} {wasSuccessful &&
User created successfully!
} )}
``` Svelte 4: ```html
{#if errors.name}
{errors.name}
{/if} {#if wasSuccessful}
User created successfully!
{/if}
``` Svelte 5: ```html
{#snippet children({ errors, hasErrors, processing, progress, wasSuccessful, recentlySuccessful, setError, clearErrors, resetAndClearErrors, defaults, isDirty, reset, submit, })} {#if errors.name}
{errors.name}
{/if} {#if wasSuccessful}
User created successfully!
{/if} {/snippet}
``` The `defaults` method allows you to update the form's default values to match the current field values. When called, subsequent `reset()` calls will restore fields to these new defaults, and the `isDirty` property will track changes from these updated defaults. Unlike `useForm`, this method accepts no arguments and always uses all current form values. The `errors` object uses dotted notation for nested fields, allowing you to display validation messages for complex form structures. Vue: ```markup
{{ errors['user.name'] }}
``` React: ```jsx
{({ errors }) => ( {errors['user.name'] &&
{errors['user.name']}
} )}
``` Svelte 4: ```html
{#if errors['user.name']}
{errors['user.name']}
{/if}
``` Svelte 5: ```html
{#snippet children({ errors })} {#if errors['user.name']}
{errors['user.name']}
{/if} {/snippet}
``` ### Props and options In addition to `action` and `method`, the `
` component accepts several props. Many of them are identical to the options available in Inertia's [visit options](/manual-visits). Vue: ```markup
``` React: ```jsx
({ ...data, timestamp: Date.now() })} invalidateCacheTags={['users', 'dashboard']} disableWhileProcessing options={{ preserveScroll: true, preserveState: true, preserveUrl: true, replace: true, only: ['users', 'flash'], except: ['secret'], reset: ['page'], }} \>
``` Svelte: ```html
({ ...data, timestamp: Date.now() })} invalidateCacheTags={['users', 'dashboard']} disableWhileProcessing options={{ preserveScroll: true, preserveState: true, preserveUrl: true, replace: true, only: ['users', 'flash'], except: ['secret'], reset: ['page'], }} \>
``` Some props are intentionally grouped under `options` instead of being top-level to avoid confusion. For example, `only`, `except`, and `reset` relate to *partial reloads*, not *partial submissions*. The general rule: top-level props are for the form submission itself, while `options` control how Inertia handles the subsequent visit. When setting the `disableWhileProcessing``disableWhileProcessing``disable-while-processing`prop, the `Form` component will add the `inert` attribute to the HTML `form`tag while the form is processing to prevent user interaction. To style the form while it's processing, you can target the inert form in the following ways. Tailwind 4: ```jsx
{/* Your form fields here */}
``` CSS: ```css form[inert] { opacity: 0.5; pointer-events: none; } ``` ### Events The `
` component emits all the standard visit [events](/events) for form submissions. Vue: ```markup
``` React: ```jsx
``` Svelte 4: ```html
``` Svelte 5: ```html
``` ### Resetting the Form The `Form` component provides several attributes that allow you to reset the form after a submission. `resetOnSuccess` may be used to reset the form after a successful submission. Vue: ```markup \
\
``` React: ```jsx // Reset the entire form on success
// Reset specific fields on success
``` Svelte: ```html \
\
``` `resetOnError` may be used to reset the form after errors. Vue: ```markup \
\
``` React: ```jsx // Reset the entire form on success
// Reset specific fields on success
``` Svelte: ```html \
\
``` ### Setting new default values The `Form` component provides the `setDefaultsOnSuccess` attribute to set the current form values as the new defaults after a successful submission. Vue: ```markup
``` React: ```jsx
``` Svelte: ```html
``` ### Dotted key notation The `
` component supports dotted key notation for creating nested objects from flat input names. This provides a convenient way to structure form data. Vue: ```markup
``` React: ```jsx
``` Svelte: ```html
``` The example above would generate the following data structure. JSON: ```json { "user": { "name": "John Doe", "skills": ["JavaScript"] }, "address": { "street": "123 Main St" } } ``` If you need literal dots in your field names (not as nested object separators), you can escape them using backslashes. Vue: ```markup
``` React: ```jsx
``` Svelte: ```html
``` The example above would generate the following data structure. JSON: ```json { "app.name": "My Application", "settings": { "theme.mode": "dark" } } ``` ### Programmatic access You can access the form's methods programmatically using refs. This provides an alternative to [slot props](#slot-props) when you need to trigger form actions from outside the form. Vue: ```markup ``` React: ```jsx import { useRef } from 'react' import { Form } from '@inertiajs/react' export default function CreateUser() { const formRef = useRef() const handleSubmit = () => { formRef.current.submit() } return (
) } ``` Svelte: ```html
``` In React and Vue, refs provide access to all form methods and reactive state. In Svelte, refs expose only methods, so reactive state like `isDirty` and `errors` should be accessed via [slot props](#slot-props) instead. ## Form helper In addition to the `
` component, Inertia also provides a `useForm` helper for when you need programmatic control over your form's data and submission behavior. Vue: ```markup ``` React: ```jsx import { useForm } from '@inertiajs/react' const { data, setData, post, processing, errors } = useForm({ email: '', password: '', remember: false, }) function submit(e) { e.preventDefault() post('/login') } return ( setData('email', e.target.value)} /> {errors.email &&
{errors.email}
} setData('password', e.target.value)} /> {errors.password &&
{errors.password}
} setData('remember', e.target.checked)} /> Remember Me
) ``` Svelte 4: ```html
{#if $form.errors.email}
{$form.errors.email}
{/if} {#if $form.errors.password}
{$form.errors.password}
{/if} Remember Me
``` Svelte 5: ```jsx
{#if $form.errors.email}
{$form.errors.email}
{/if} {#if $form.errors.password}
{$form.errors.password}
{/if} Remember Me
``` To submit the form, you may use the `get`, `post`, `put`, `patch`and `delete` methods. Vue: ```js form.submit(method, url, options) form.get(url, options) form.post(url, options) form.put(url, options) form.patch(url, options) form.delete(url, options) ``` React: ```js const { submit, get, post, put, patch, delete: destroy } = useForm({ ... }) submit(method, url, options) get(url, options) post(url, options) put(url, options) patch(url, options) destroy(url, options) ``` Svelte: ```js $form.submit(method, url, options) $form.get(url, options) $form.post(url, options) $form.put(url, options) $form.patch(url, options) $form.delete(url, options) ``` The submit methods support all of the typical [visit options](/manual-visits), such as `preserveState`, `preserveScroll`, and event callbacks, which can be helpful for performing tasks on successful form submissions. For example, you might use the `onSuccess` callback to reset inputs to their original state. Vue: ```js form.post('/profile', { preserveScroll: true, onSuccess: () => form.reset('password'), }) ``` React: ```js const { post, reset } = useForm({ ... }) post('/profile', { preserveScroll: true, onSuccess: () => reset('password'), }) ``` Svelte: ```js $form.post('/profile', { preserveScroll: true, onSuccess: () => $form.reset('password'), }) ``` If you need to modify the form data before it's sent to the server, you can do so via the `transform()` method. Vue: ```js form .transform((data) => ({ ...data, remember: data.remember ? 'on' : '', })) .post('/login') ``` React: ```js const { transform } = useForm({ ... }) transform((data) => ({ ...data, remember: data.remember ? 'on' : '', })) ``` Svelte: ```js $form .transform((data) => ({ ...data, remember: data.remember ? 'on' : '', })) .post('/login') ``` You can use the `processing` property to track if a form is currently being submitted. This can be helpful for preventing double form submissions by disabling the submit button. Vue: ```jsx ``` React: ```jsx const { processing } = useForm({ ... }) ``` Svelte: ```jsx ``` If your form is uploading files, the current progress event is available via the `progress` property, allowing you to easily display the upload progress. Vue: ```jsx {{ form.progress.percentage }}% ``` React: ```jsx const { progress } = useForm({ ... }) {progress && ( {progress.percentage}% )} ``` Svelte: ```jsx {#if $form.progress} {$form.progress.percentage}% {/if} ``` ### Form errors If there are form validation errors, they are available via the `errors` property. When building Laravel powered Inertia applications, form errors will automatically be populated when your application throws instances of `ValidationException`, such as when using `{'$request->validate()'}`. Vue: ```jsx
{{ form.errors.email }}
``` React: ```jsx const { errors } = useForm({ ... }) {errors.email &&
{errors.email}
} ``` Svelte: ```jsx {#if $form.errors.email}
{$form.errors.email}
{/if} ``` For a more thorough discussion of form validation and errors, please consult the [validation documentation](/validation). To determine if a form has any errors, you may use the `hasErrors` property. To clear form errors, use the `clearErrors()` method. Vue: ```js // Clear all errors... form.clearErrors() // Clear errors for specific fields... form.clearErrors('field', 'anotherfield') ``` React: ```js const { clearErrors } = useForm({ ... }) // Clear all errors... clearErrors() // Clear errors for specific fields... clearErrors('field', 'anotherfield') ``` Svelte: ```js // Clear all errors... $form.clearErrors() // Clear errors for specific fields... $form.clearErrors('field', 'anotherfield') ``` If you're using client-side input validation libraries or do client-side validation manually, you can set your own errors on the form using the `setErrors()` method. Vue: ```js // Set a single error... form.setError('field', 'Your error message.'); // Set multiple errors at once... form.setError({ foo: 'Your error message for the foo field.', bar: 'Some other error for the bar field.' }); ``` React: ```js const { setError } = useForm({ ... }) // Set a single error... setError('field', 'Your error message.'); // Set multiple errors at once... setError({ foo: 'Your error message for the foo field.', bar: 'Some other error for the bar field.' }); ``` Svelte: ```js // Set a single error $form.setError('field', 'Your error message.'); // Set multiple errors at once $form.setError({ foo: 'Your error message for the foo field.', bar: 'Some other error for the bar field.' }); ``` Unlike an actual form submission, the page's props remain unchanged when manually setting errors on a form instance. When a form has been successfully submitted, the `wasSuccessful` property will be `true`. In addition to this, forms have a `recentlySuccessful` property, which will be set to `true` for two seconds after a successful form submission. This property can be utilized to show temporary success messages. ### Resetting the Form To reset the form's values back to their default values, you can use the `reset()` method. Vue: ```js // Reset the form... form.reset() // Reset specific fields... form.reset('field', 'anotherfield') ``` React: ```js const { reset } = useForm({ ... }) // Reset the form... reset() // Reset specific fields... reset('field', 'anotherfield') ``` Svelte: ```js // Reset the form... $form.reset() // Reset specific fields... $form.reset('field', 'anotherfield') ``` Sometimes, you may want to restore your form fields to their default values and clear any validation errors at the same time. Instead of calling `reset()` and `clearErrors()` separately, you can use the `resetAndClearErrors()` method, which combines both actions into a single call. Vue: ```js // Reset the form and clear all errors... form.resetAndClearErrors() // Reset specific fields and clear their errors... form.resetAndClearErrors('field', 'anotherfield') ``` React: ```js const { resetAndClearErrors } = useForm({ ... }) // Reset the form and clear all errors... resetAndClearErrors() // Reset specific fields and clear their errors... resetAndClearErrors('field', 'anotherfield') ``` Svelte: ```js // Reset the form and clear all errors... $form.resetAndClearErrors() // Reset specific fields and clear their errors... $form.resetAndClearErrors('field', 'anotherfield') ``` ### Setting new default values If your form's default values become outdated, you can use the `defaults()` method to update them. Then, the form will be reset to the correct values the next time the `reset()` method is invoked. Vue: ```js // Set the form's current values as the new defaults... form.defaults() // Update the default value of a single field... form.defaults('email', 'updated-default@example.com') // Update the default value of multiple fields... form.defaults({ name: 'Updated Example', email: 'updated-default@example.com', }) ``` React: ```js const { setDefaults } = useForm({ ... }) // Set the form's current values as the new defaults... setDefaults() // Update the default value of a single field... setDefaults('email', 'updated-default@example.com') // Update the default value of multiple fields... setDefaults({ name: 'Updated Example', email: 'updated-default@example.com', }) ``` Svelte: ```js // Set the form's current values as the new defaults... $form.defaults() // Update the default value of a single field... $form.defaults('email', 'updated-default@example.com') // Change the default value of multiple fields... $form.defaults({ name: 'Updated Example', email: 'updated-default@example.com', }) ``` ### Form field change tracking To determine if a form has any changes, you may use the `isDirty` property. Vue: ```markup
There are unsaved form changes.
``` React: ```jsx const { isDirty } = useForm({ ... }) {isDirty &&
There are unsaved form changes.
} ``` Svelte: ```html {#if $form.isDirty}
There are unsaved form changes.
{/if} ``` ### Canceling Form submissions To cancel a form submission, use the `cancel()` method. Vue: ```js form.cancel() ``` React: ```js const { cancel } = useForm({ ... }) cancel() ``` Svelte: ```js $form.cancel() ``` ### Form data and history state To instruct Inertia to store a form's data and errors in [history state](/remembering-state), you can provide a unique form key as the first argument when instantiating your form. Vue: ```js import { useForm } from '@inertiajs/vue3' const form = useForm('CreateUser', data) const form = useForm(\`EditUser:\${user.id}\ ``` React: ```js import { useForm } from '@inertiajs/react' const form = useForm('CreateUser', data) const form = useForm(\`EditUser:\${user.id}\ ``` Svelte: ```js import { useForm } from '@inertiajs/svelte' const form = useForm('CreateUser', data) const form = useForm(\`EditUser:\${user.id}\ ``` ### Wayfinder When using [Wayfinder](https://github.com/laravel/wayfinder) in conjunction with the form helper, you can simply pass the resulting object directly to the `form.submit` method. The form helper will infer the HTTP method and URL from the Wayfinder object. Vue: ```js import { useForm } from '@inertiajs/vue3' import { store } from 'App/Http/Controllers/UserController' const form = useForm({ name: 'John Doe', email: 'john.doe@example.com', }) form.submit(store()) ``` React: ```js import { useForm } from '@inertiajs/react' import { store } from 'App/Http/Controllers/UserController' const form = useForm({ name: 'John Doe', email: 'john.doe@example.com', }) form.submit(store()) ``` Svelte: ```js import { useForm } from '@inertiajs/svelte' import { store } from 'App/Http/Controllers/UserController' const form = useForm({ name: 'John Doe', email: 'john.doe@example.com', }) form.submit(store()) ``` ## Server-side responses When using Inertia, you don't typically inspect form responses client-side like you would with traditional XHR/fetch requests. Instead, your server-side route or controller issues a [redirect](/redirects)response after processing the form, often redirecting to a success page. Laravel: ```php class UsersController extends Controller { public function index() { return Inertia::render('Users/Index', [ 'users' => User::all(), ]); } public function store(Request $request) { User::create($request->validate([ 'first_name' => ['required', 'max:50'], 'last_name' => ['required', 'max:50'], 'email' => ['required', 'max:50', 'email'], ])); return to_route('users.index'); } } ``` This redirect-based approach works with all form submission methods: the `
` component, `useForm` helper, and manual router submissions. It makes handling Inertia forms feel very similar to classic server-side form submissions. ## Server-side validation Both the `` component and `useForm` helper automatically handle server-side validation errors. When your server returns validation errors, they're automatically available in the `errors` object without any additional configuration. Unlike traditional XHR/fetch requests where you might check for a `422` status code, Inertia handles validation errors as part of its redirect-based flow, just like classic server-side form submissions, but without the full page reload. For a complete guide on validation error handling, including error bags and advanced scenarios, see the [validation documentation](/validation). ## Manual form submissions It's also possible to submit forms manually using Inertia's `router` methods directly, without using the `` component or `useForm` helper: Vue: ```markup ``` React: ```jsx import { useState } from 'react' import { router } from '@inertiajs/react' export default function Edit() { const [values, setValues] = useState({ first_name: "", last_name: "", email: "", }) function handleChange(e) { const key = e.target.id; const value = e.target.value setValues(values => ({ ...values, [key]: value, })) } function handleSubmit(e) { e.preventDefault() router.post('/users', values) } return (
) } ``` Svelte 4: ```html
``` Svelte 5: ```html
``` ## File uploads When making requests or form submissions that include files, Inertia will automatically convert the request data into a `FormData` object. This works with the `
` component, `useForm` helper, and manual router submissions. For more information on file uploads, including progress tracking, see the [file uploads documentation](/file-uploads). ## XHR / fetch submissions Using Inertia to submit forms works great for the vast majority of situations. However, in the event that you need more control over the form submission, you're free to make plain XHR or `fetch` requests instead, using the library of your choice. # File uploads ## FormData conversion When making Inertia requests that include files (even nested files), Inertia will automatically convert the request data into a `FormData` object. This conversion is necessary in order to submit a `multipart/form-data` request via XHR. If you would like the request to always use a `FormData` object regardless of whether a file is present in the data, you may provide the `forceFormData` option when making the request. Vue: ```js import { router } from '@inertiajs/vue3' router.post('/users', data, { forceFormData: true, }) ``` React: ```js import { router } from '@inertiajs/react' router.post('/users', data, { forceFormData: true, }) ``` Svelte: ```js import { router } from '@inertiajs/svelte' router.post('/users', data, { forceFormData: true, }) ``` You can learn more about the `FormData` interface via its [MDN documentation](https://developer.mozilla.org/en-US/docs/Web/API/FormData). Prior to version 0.8.0, Inertia did not automatically convert requests to `FormData`. If you're using an Inertia release prior to this version, you will need to manually perform this conversion. ## File upload example Let's examine a complete file upload example using Inertia. This example includes both a `name` text input and an `avatar` file input. Vue: ```markup ``` React: ```jsx import { useForm } from '@inertiajs/react' const { data, setData, post, progress } = useForm({ name: null, avatar: null, }) function submit(e) { e.preventDefault() post('/users') } return ( setData('name', e.target.value)} /> setData('avatar', e.target.files[0])} /> {progress && ( {progress.percentage}% )}
) ``` Svelte 4: ```jsx
$form.avatar = e.target.files[0]} /> {#if $form.progress} {$form.progress.percentage}% {/if}
``` Svelte 5: ```jsx
$form.avatar = e.target.files[0]} /> {#if $form.progress} {$form.progress.percentage}% {/if}
``` This example uses the [Inertia form helper](/forms#form-helper) for convenience, since the form helper provides easy access to the current upload progress. However, you are free to submit your forms using [manual Inertia visits](/manual-visits) as well. ## Multipart limitations Uploading files using a `multipart/form-data` request is not natively supported in some server-side frameworks when using the `PUT`,`PATCH`, or `DELETE` HTTP methods. The simplest workaround for this limitation is to simply upload files using a `POST` request instead. However, some frameworks, such as [Laravel](https://laravel.com/docs/routing#form-method-spoofing)and [Rails ](https://guides.rubyonrails.org/form_helpers.html#how-do-forms-with-patch-put-or-delete-methods-work-questionmark), support form method spoofing, which allows you to upload the files using `POST`, but have the framework handle the request as a `PUT` or `PATCH` request. This is done by including a `_method` attribute in the data of your request. Vue: ```js import { router } from '@inertiajs/vue3' router.post(\`/users/\${user.id}\ ``` React: ```js import { router } from '@inertiajs/react' router.post(\`/users/\${user.id}\ ``` Svelte: ```js import { router } from '@inertiajs/svelte' router.post(\`/users/\${user.id}\ ``` # Validation ## How it works Handling server-side validation errors in Inertia works differently than a classic XHR-driven form that requires you to catch the validation errors from `422` responses and manually update the form's error state - because Inertia never receives `422` responses. Instead, Inertia operates much more like a standard full page form submission. Here's how: First, you [submit your form using Inertia](/forms). If there are server-side validation errors, you don't return those errors as a `422` JSON response. Instead, you redirect (server-side) the user back to the form page they were previously on, flashing the validation errors in the session. Some frameworks, such as Laravel, do this automatically. Next, any time these validation errors are present in the session, they automatically get shared with Inertia, making them available client-side as page props which you can display in your form. Since props are reactive, they are automatically shown when the form submission completes. Finally, since Inertia apps never generate `422` responses, Inertia needs another way to determine if a response includes validation errors. To do this, Inertia checks the `page.props.errors` object for the existence of any errors. In the event that errors are present, the request's `onError()` callback will be called instead of the `onSuccess()` callback. ## Sharing errors In order for your server-side validation errors to be available client-side, your server-side framework must share them via the `errors` prop. Inertia's first-party adapters, such as the Laravel adapter, do this automatically. For other frameworks, you may need to do this manually. Please refer to your specific server-side adapter documentation for more information. ## Displaying errors Since validation errors are made available client-side as page component props, you can conditionally display them based on their existence. Remember, when using our first-party server adapters (such as the Laravel adapter), the `errors` prop will automatically be available to your page. Vue: ```markup ``` React: ```jsx import { useState } from 'react' import { router, usePage } from '@inertiajs/react' export default function Edit() { const { errors } = usePage().props const [values, setValues] = useState({ first_name: null, last_name: null, email: null, }) function handleChange(e) { setValues(values => ({ ...values, [e.target.id]: e.target.value, })) } function handleSubmit(e) { e.preventDefault() router.post('/users', values) } return (
{errors.first_name &&
{errors.first_name}
} {errors.last_name &&
{errors.last_name}
} {errors.email &&
{errors.email}
}
) } ``` Svelte: ```html
{#if errors.first_name}
{errors.first_name}
{/if} {#if errors.last_name}
{errors.last_name}
{/if} {#if errors.email}
{errors.email}
{/if}
``` When using the Vue adapters, you may also access the errors via the `$page.props.errors` object. ## Repopulating input While handling errors in Inertia is similar to full page form submissions, Inertia offers even more benefits. In fact, you don't even need to manually repopulate old form input data. When validation errors occur, the user is typically redirected back to the form page they were previously on. And, by default, Inertia automatically preserves the [component state](/manual-visits#state-preservation) for `post`, `put`, `patch`, and `delete` requests. Therefore, all the old form input data remains exactly as it was when the user submitted the form. So, the only work remaining is to display any validation errors using the `errors` prop. ## Error bags If you're using the [form helper](/forms#form-helper), it's not necessary to use error bags since validation errors are automatically scoped to the form object making the request. For pages that have more than one form, it's possible to encounter conflicts when displaying validation errors if two forms share the same field names. For example, imagine a "create company" form and a "create user" form that both have a `name` field. Since both forms will be displaying the `page.props.errors.name` validation error, generating a validation error for the `name`field in either form will cause the error to appear in both forms. To solve this issue, you can use "error bags". Error bags scope the validation errors returned from the server within a unique key specific to that form. Continuing with our example above, you might have a `createCompany` error bag for the first form and a `createUser` error bag for the second form. Vue: ```js import { router } from '@inertiajs/vue3' router.post('/companies', data, { errorBag: 'createCompany', }) router.post('/users', data, { errorBag: 'createUser', }) ``` React: ```js import { router } from '@inertiajs/react' router.post('/companies', data, { errorBag: 'createCompany', }) router.post('/users', data, { errorBag: 'createUser', }) ``` Svelte: ```js import { router } from '@inertiajs/svelte' router.post('/companies', data, { errorBag: 'createCompany', }) router.post('/users', data, { errorBag: 'createUser', }) ``` Specifying an error bag will cause the validation errors to come back from the server within `page.props.errors.createCompany` and `page.props.errors.createUser`. # Shared data Sometimes you need to access specific pieces of data on numerous pages within your application. For example, you may need to display the current user in the site header. Passing this data manually in each response across your entire application is cumbersome. Thankfully, there is a better option: shared data. ## Sharing data Inertia's server-side adapters all provide a method of making shared data available for every request. This is typically done outside of your controllers. Shared data will be automatically merged with the page props provided in your controller. In Laravel applications, this is typically handled by the `HandleInertiaRequests` middleware that is automatically installed when installing the [server-side adapter](/server-side-setup#middleware). Laravel: ```php class HandleInertiaRequests extends Middleware { public function share(Request $request) { return array_merge(parent::share($request), [ // Synchronously... 'appName' => config('app.name'), // Lazily... 'auth.user' => fn () => $request->user() ? $request->user()->only('id', 'name', 'email') : null, ]); } } ``` Alternatively, you can manually share data using the `Inertia::share` method. Laravel: ```php use Inertia\\Inertia; // Synchronously... Inertia::share('appName', config('app.name')); // Lazily... Inertia::share('user', fn (Request $request) => $request->user() ? $request->user()->only('id', 'name', 'email') : null ); ``` Shared data should be used sparingly as all shared data is included with every response. Page props and shared data are merged together, so be sure to namespace your shared data appropriately to avoid collisions. ## Accessing shared data Once you have shared the data server-side, you will be able to access it within any of your pages or components. Here's an example of how to access shared data in a layout component. Vue: ```markup ``` React: ```jsx import { usePage } from '@inertiajs/react' export default function Layout({ children }) { const { auth } = usePage().props return (
You are logged in as: {auth.user.name}
{children}
) } ``` Svelte: ```html
You are logged in as: {$page.props.auth.user.name}
``` ## Flash messages Another great use-case for shared data is flash messages. These are messages stored in the session only for the next request. For example, it's common to set a flash message after completing a task and before redirecting to a different page. Here's a simple way to implement flash messages in your Inertia applications. First, share the flash message on each request. Laravel: ```php class HandleInertiaRequests extends Middleware { public function share(Request $request) { return array_merge(parent::share($request), [ 'flash' => [ 'message' => fn () => $request->session()->get('message') ], ]); } } ``` Next, display the flash message in a frontend component, such as the site layout. Vue: ```markup ``` React: ```jsx import { usePage } from '@inertiajs/react' export default function Layout({ children }) { const { flash } = usePage().props return (
{flash.message && (
{flash.message}
)} {children}
) } ``` Svelte: ```html
{#if $page.props.flash.message}
{$page.props.flash.message}
{/if}
``` # Partial reloads When making visits to the same page you are already on, it's not always necessary to re-fetch all of the page's data from the server. In fact, selecting only a subset of the data can be a helpful performance optimization if it's acceptable that some page data becomes stale. Inertia makes this possible via its "partial reload" feature. As an example, consider a "user index" page that includes a list of users, as well as an option to filter the users by their company. On the first request to the page, both the `users` and `companies`props are passed to the page component. However, on subsequent visits to the same page (maybe to filter the users), you can request only the `users` data from the server without requesting the `companies` data. Inertia will then automatically merge the partial data returned from the server with the data it already has in memory client-side. Partial reloads only work for visits made to the same page component. ## Only certain props To perform a partial reload, use the `only` visit option to specify which data the server should return. This option should be an array of keys which correspond to the keys of the props. Vue: ```js import { router } from '@inertiajs/vue3' router.visit(url, { only: ['users'], }) ``` React: ```js import { router } from '@inertiajs/react' router.visit(url, { only: ['users'], }) ``` Svelte: ```js import { router } from '@inertiajs/svelte' router.visit(url, { only: ['users'], }) ``` ## Except certain props In addition to the `only` visit option you can also use the `except` option to specify which data the server should exclude. This option should also be an array of keys which correspond to the keys of the props. Vue: ```js import { router } from '@inertiajs/vue3' router.visit(url, { except: ['users'], }) ``` React: ```js import { router } from '@inertiajs/react' router.visit(url, { except: ['users'], }) ``` Svelte: ```js import { router } from '@inertiajs/svelte' router.visit(url, { except: ['users'], }) ``` ## Router shorthand Since partial reloads can only be made to the same page component the user is already on, it almost always makes sense to just use the `router.reload()` method, which automatically uses the current URL. Vue: ```js import { router } from '@inertiajs/vue3' router.reload({ only: ['users'] }) ``` React: ```js import { router } from '@inertiajs/react' router.reload({ only: ['users'] }) ``` Svelte: ```js import { router } from '@inertiajs/svelte' router.reload({ only: ['users'] }) ``` ## Using links It's also possible to perform partial reloads with Inertia links using the `only` property. Vue: ```jsx import { Link } from '@inertiajs/vue3' Show active ``` React: ```jsx import { Link } from '@inertiajs/react' Show active ``` Svelte: ```jsx import { inertia, Link } from '@inertiajs/svelte' Show active Show active ``` ## Lazy data evaluation For partial reloads to be most effective, be sure to also use lazy data evaluation when returning props from your server-side routes or controllers. This can be accomplished by wrapping all optional page data in a closure. Laravel: ```php return Inertia::render('Users/Index', [ 'users' => fn () => User::all(), 'companies' => fn () => Company::all(), ]); ``` When Inertia performs a request, it will determine which data is required and only then will it evaluate the closure. This can significantly increase the performance of pages that contain a lot of optional data. Additionally, Inertia provides an `Inertia::optional()` method to specify that a prop should never be included unless explicitly requested using the `only` option: Laravel: ```php return Inertia::render('Users/Index', [ 'users' => Inertia::optional(fn () => User::all()), ]); ``` On the inverse, you can use the `Inertia::always()` method to specify that a prop should always be included, even if it has not been explicitly required in a partial reload. Laravel: ```php return Inertia::render('Users/Index', [ 'users' => Inertia::always(User::all()), ]); ``` Here's a summary of each approach: Laravel: ```php return Inertia::render('Users/Index', [ // ALWAYS included on standard visits // OPTIONALLY included on partial reloads // ALWAYS evaluated 'users' => User::all(), // ALWAYS included on standard visits // OPTIONALLY included on partial reloads // ONLY evaluated when needed 'users' => fn () => User::all(), // NEVER included on standard visits // OPTIONALLY included on partial reloads // ONLY evaluated when needed 'users' => Inertia::optional(fn () => User::all()), // ALWAYS included on standard visits // ALWAYS included on partial reloads // ALWAYS evaluated 'users' => Inertia::always(User::all()), ]); ``` # Deferred props Inertia's deferred props feature allows you to defer the loading of certain page data until after the initial page render. This can be useful for improving the perceived performance of your app by allowing the initial page render to happen as quickly as possible. ## Server side To defer a prop, you can use the `Inertia::defer()` method when returning your response. This method receives a callback that returns the prop data. The callback will be executed in a separate request after the initial page render. Laravel: ```php Route::get('/users', function () { return Inertia::render('Users/Index', [ 'users' => User::all(), 'roles' => Role::all(), 'permissions' => Inertia::defer(fn () => Permission::all()), ]); }); ``` ### Grouping requests By default, all deferred props get fetched in one request after the initial page is rendered, but you can choose to fetch data in parallel by grouping props together. Laravel: ```php Route::get('/users', function () { return Inertia::render('Users/Index', [ 'users' => User::all(), 'roles' => Role::all(), 'permissions' => Inertia::defer(fn () => Permission::all()), 'teams' => Inertia::defer(fn () => Team::all(), 'attributes'), 'projects' => Inertia::defer(fn () => Project::all(), 'attributes'), 'tasks' => Inertia::defer(fn () => Task::all(), 'attributes'), ]); }); ``` In the example above, the `teams`, `projects`, and `tasks` props will be fetched in one request, while the `permissions` prop will be fetched in a separate request in parallel. Group names are arbitrary strings and can be anything you choose. ## Client side On the client side, Inertia provides the `Deferred` component to help you manage deferred props. This component will automatically wait for the specified deferred props to be available before rendering its children. Vue: ```markup ``` React: ```jsx import { Deferred } from '@inertiajs/react' export default () => ( Loading...
}> ) ``` Svelte 4: ```jsx
Loading...
{#each permissions as permission} \ {/each}
``` Svelte 5: ```jsx {#snippet fallback()}
Loading...
{/snippet} {#each permissions as permission} \ {/each}
``` If you need to wait for multiple deferred props to become available, you can specify an array to the `data` prop. Vue: ```markup ``` React: ```jsx import { Deferred } from '@inertiajs/react' export default () => ( Loading...
}> ) ``` Svelte 4: ```jsx
Loading...
\
``` Svelte 5: ```jsx {#snippet fallback()}
Loading...
{/snippet} \
``` # Merging props By default, Inertia overwrites props with the same name when reloading a page. However, there are instances, such as pagination or infinite scrolling, where that is not the desired behavior. In these cases, you can merge props instead of overwriting them. ## Server side To specify that a prop should be merged, you can use the `Inertia::merge()` or `Inertia::deepMerge()` methods on the prop value. Use `merge` when merging simple arrays, and `deepMerge` when working with nested objects that contain arrays or complex structures, such as pagination objects. Shallow Merge: ```php Route::get('/items', function () { // Static array of tags $allTags = [ 'Laravel', 'React', 'Vue', 'Tailwind', 'Inertia', 'PHP', 'JavaScript', 'TypeScript', 'Docker', 'Vite', ]; // Get chunk of tags by page $page = request()->input('page', 1); $perPage = 5; $offset = ($page - 1) * $perPage; $tags = array_slice($allTags, $offset, $perPage); return Inertia::render('Tags/Index', [ 'tags' => Inertia::merge($tags), ]); }); ``` Deep Merge: ```php Route::get('/users', function () { $page = request()->input('page', 1); $perPage = request()->input('per_page', 10); return Inertia::render('Users/Index', [ 'results' => Inertia::deepMerge(User::paginate($perPage, page: $page)), ]); }); ``` During the merging process, if the value is an array, the incoming items will be *appended* to the existing array, not merged by index. However, you may chain the `matchOn` method to determine how existing items should be matched and updated. ```php Inertia::render('Users/Index', [ 'users' => Inertia::deepMerge($users)->matchOn('data.id'), ]); ``` In this example, Inertia will iterate over the `users.data` array and attempt to match each item by its `id` field. If a match is found, the existing item will be replaced. If no match is found, the new item will be appended. You may also pass an array of keys to `matchOn` to specify multiple keys for matching. ## Client side On the client side, Inertia detects that this prop should be merged. If the prop returns an array, it will append the response to the current prop value. If it's an object, it will merge the response with the current prop value. If you have opted to `deepMerge`, Inertia ensures a deep merge of the entire structure. ## Combining with deferred props You can also combine [deferred props](/deferred-props) with mergeable props to defer the loading of the prop and ultimately mark it as mergeable once it's loaded. Laravel: ```php Route::get('/users', function () { $page = request()->input('page', 1); $perPage = request()->input('per_page', 10); return Inertia::render('Users/Index', [ 'results' => Inertia::defer(fn() => User::paginate($perPage, page: $page))->deepMerge(), ]); }); ``` ## Resetting props On the client side, you can indicate to the server that you would like to reset the prop. This is useful when you want to clear the prop value before merging new data, such as when the user enters a new search query on a paginated list. The `reset` request option accepts an array of the props keys you would like to reset. Vue: ```js router.reload({ reset: ['results'], // ... }) ``` # Polling ## Poll helper Polling your server for new information on the current page is common, so Inertia provides a poll helper designed to help reduce the amount of boilerplate code. In addition, the poll helper will automatically stop polling when the page is unmounted. The only required argument is the polling interval in milliseconds. Vue: ```js import { usePoll } from '@inertiajs/vue3' usePoll(2000) ``` React: ```jsx import { usePoll } from '@inertiajs/react' usePoll(2000) ``` Svelte: ```js import { usePoll } from '@inertiajs/svelte' usePoll(2000) ``` If you need to pass additional request options to the poll helper, you can pass any of the `router.reload` options as the second parameter. Vue: ```js import { usePoll } from '@inertiajs/vue3' usePoll(2000, { onStart() { console.log('Polling request started') }, onFinish() { console.log('Polling request finished') } }) ``` React: ```jsx import { usePoll } from '@inertiajs/react' usePoll(2000, { onStart() { console.log('Polling request started') }, onFinish() { console.log('Polling request finished') } }) ``` Svelte: ```js import { usePoll } from '@inertiajs/svelte' usePoll(2000, { onStart() { console.log('Polling request started') }, onFinish() { console.log('Polling request finished') } }) ``` If you'd like more control over the polling behavior, the poll helper provides `stop` and `start`methods that allow you to manually start and stop polling. You can pass the `autoStart: false` option to the poll helper to prevent it from automatically starting polling when the component is mounted. Vue: ```markup ``` React: ```jsx import { usePoll } from '@inertiajs/react' export default () => { const { start, stop } = usePoll(2000, {}, { autoStart: false, }) return (
) } ``` Svelte: ```js import { usePoll } from '@inertiajs/svelte' const { start, stop } = usePoll(2000, {}, { autoStart: false, }) ``` ## Throttling By default, the poll helper will throttle requests by 90% when the browser tab is in the background. If you'd like to disable this behavior, you can pass the `keepAlive` option to the poll helper. Vue: ```js import { usePoll } from '@inertiajs/vue3' usePoll(2000, {}, { keepAlive: true, }) ``` React: ```jsx import { usePoll } from '@inertiajs/react' usePoll(2000, {}, { keepAlive: true, }) ``` Svelte: ```js import { usePoll } from '@inertiajs/svelte' usePoll(2000, {}, { keepAlive: true, }) ``` # Prefetching Inertia supports prefetching data for pages that are likely to be visited next. This can be useful for improving the perceived performance of your app by allowing the data to be fetched in the background while the user is still interacting with the current page. ## Link prefetching To prefetch data for a page, you can add the `prefetch` prop to the Inertia link component. By default, Inertia will prefetch the data for the page when the user hovers over the link for more than 75ms. Vue: ```markup import { Link } from '@inertiajs/vue3' Users ``` React: ```jsx import { Link } from '@inertiajs/react' Users ``` Svelte: ```jsx import { inerta } from '@inertiajs/svelte' Users ``` By default, data is cached for 30 seconds before being evicted. You can customize this behavior by passing a `cacheFor` prop to the `Link` component. Vue: ```markup import { Link } from '@inertiajs/vue3' Users Users Users ``` React: ```jsx import { Link } from '@inertiajs/react' Users Users Users ``` Svelte: ```jsx import { inertia } from '@inertiajs/svelte' Users Users Users ``` Instead of prefetching on hover, you can also start prefetching on `mousedown` by passing the `click` value to the `prefetch` prop. Vue: ```markup import { Link } from '@inertiajs/vue3' Users ``` React: ```jsx import { Link } from '@inertiajs/react' Users ``` Svelte: ```jsx import { inertia } from '@inertiajs/svelte' Users ``` If you're confident that the user will visit a page next, you can prefetch the data on mount as well. Vue: ```markup import { Link } from '@inertiajs/vue3' Users ``` React: ```jsx import { Link } from '@inertiajs/react' Users ``` Svelte: ```jsx import { inerta } from '@inertiajs/svelte' Users ``` You can also combine prefetch strategies by passing an array of values to the `prefetch` prop. Vue: ```markup import { Link } from '@inertiajs/vue3' Users ``` React: ```jsx import { Link } from '@inertiajs/react' Users ``` Svelte: ```jsx import { inertia } from '@inertiajs/svelte' Users ``` ## Programmatic prefetching You can prefetch data programmatically using `router.prefetch`. This method's signature is identical to `router.visit` with the exception of a third argument that allows you to specify prefetch options. When the `cacheFor` option is not specified, it defaults to 30 seconds. Vue: ```js router.prefetch( '/users', { method: 'get', data: { page: 2 } }, ) router.prefetch( '/users', { method: 'get', data: { page: 2 } }, { cacheFor: '1m' }, ) ``` Inertia also provides a `usePrefetch` hook that allows you to track the prefetch state for the current page. It returns information about whether the page is currently prefetching, has been prefetched, when it was last updated, and a `flush` method that flushes the cache for the current page only. Vue: ```js import { usePrefetch } from '@inertiajs/vue3' const { lastUpdatedAt, isPrefetching, isPrefetched, flush } = usePrefetch() ``` React: ```js import { usePrefetch } from '@inertiajs/react' const { lastUpdatedAt, isPrefetching, isPrefetched, flush } = usePrefetch() ``` Svelte: ```js import { usePrefetch } from '@inertiajs/svelte' const { lastUpdatedAt, isPrefetching, isPrefetched, flush } = usePrefetch() ``` You can also pass visit options when you need to differentiate between different request configurations for the same URL. Vue: ```js import { usePrefetch } from '@inertiajs/vue3' const { lastUpdatedAt, isPrefetching, isPrefetched, flush } = usePrefetch({ headers: { 'X-Custom-Header': 'value' } }) ``` React: ```js import { usePrefetch } from '@inertiajs/react' const { lastUpdatedAt, isPrefetching, isPrefetched, flush } = usePrefetch({ headers: { 'X-Custom-Header': 'value' } }) ``` Svelte: ```js import { usePrefetch } from '@inertiajs/svelte' const { lastUpdatedAt, isPrefetching, isPrefetched, flush } = usePrefetch({ headers: { 'X-Custom-Header': 'value' } }) ``` ## Cache tags Cache tags allow you to group related prefetched data and invalidate all cached data with that tag when specific events occur. To tag cached data, pass a `cacheTags` prop to your `Link` component. Vue: ```markup ``` React: ```jsx import { Link } from '@inertiajs/react' Users Dashboard ``` Svelte: ```jsx import { inertia } from '@inertiajs/svelte' Users Dashboard ``` When prefetching programmatically, pass `cacheTags` in the third argument to `router.prefetch`. Vue: ```js router.prefetch('/users', {}, { cacheTags: 'users' }) router.prefetch('/dashboard', {}, { cacheTags: ['dashboard', 'stats'] }) ``` ## Cache invalidation You can manually flush the prefetch cache by calling `router.flushAll` to remove all cached data, or `router.flush` to remove cache for a specific page. Vue: ```js // Flush all prefetch cache router.flushAll() // Flush cache for a specific page router.flush('/users', { method: 'get', data: { page: 2 } }) // Using the usePrefetch hook const { flush } = usePrefetch() // Flush cache for the current page flush() ``` For more granular control, you can flush cached data by their tags using `router.flushByCacheTags`. This removes any cached response that contains *any* of the specified tags. Vue: ```js // Flush all responses tagged with 'users' router.flushByCacheTags('users') // Flush all responses tagged with 'dashboard' OR 'stats' router.flushByCacheTags(['dashboard', 'stats']) ``` ### Automatic cache flushing By default, Inertia does not automatically flush the prefetch cache when you navigate to new pages. Cached data is only evicted when it expires based on the cache duration. If you want to flush all cached data on every navigation, you can set up an event listener. Vue: ```js import { router } from '@inertiajs/vue3' router.on('navigate', () => router.flushAll()) ``` React: ```js import { router } from '@inertiajs/react' router.on('navigate', () => router.flushAll()) ``` Svelte: ```js import { router } from '@inertiajs/svelte' router.on('navigate', () => router.flushAll()) ``` ### Invalidate on requests To automatically invalidate caches when making requests, pass an `invalidateCacheTags` prop to the `Form` component. The specified tags will be flushed when the form submission succeeds. Vue: ```markup ``` React: ```jsx import { Form } from '@inertiajs/react' export default () => (
) ``` Svelte: ```html
``` When using the `useForm` helper, you can include `invalidateCacheTags` in the visit options. Vue: ```js import { useForm } from '@inertiajs/vue3' const form = useForm({ name: '', email: '', }) const submit = () => { form.post('/users', { invalidateCacheTags: ['users', 'dashboard'] }) } ``` React: ```js import { useForm } from '@inertiajs/react' const { data, setData, post } = useForm({ name: '', email: '', }) function submit(e) { e.preventDefault() post('/users', { invalidateCacheTags: ['users', 'dashboard'] }) } ``` Svelte: ```js import { useForm } from '@inertiajs/svelte' const form = useForm({ name: '', email: '', }) function submit() { $form.post('/users', { invalidateCacheTags: ['users', 'dashboard'] }) } ``` You can also invalidate cache tags with programmatic visits by including `invalidateCacheTags` in the options. Vue: ```js router.delete(\`/users/\${userId}\ ``` ## Stale while revalidate By default, Inertia will fetch a fresh copy of the data when the user visits the page if the cached data is older than the cache duration. You can customize this behavior by passing a tuple to the `cacheFor`prop. The first value in the array represents the number of seconds the cache is considered fresh, while the second value defines how long it can be served as stale data before fetching data from the server is necessary. Vue: ```markup import { Link } from '@inertiajs/vue3' Users ``` React: ```jsx import { Link } from '@inertiajs/react' Users ``` Svelte: ```jsx import { inertia } from '@inertiajs/svelte' Users ``` If a request is made within the fresh period (before the first value), the cache is returned immediately without making a request to the server. If a request is made during the stale period (between the two values), the stale value is served to the user, and a request is made in the background to refresh the cached data. Once the fresh data is returned, it is merged into the page so the user has the most recent data. If a request is made after the second value, the cache is considered expired, and the page and data is fetched from the sever as a regular request. # Load when visible Inertia supports lazy loading data on scroll using the Intersection Observer API. It provides the `WhenVisible` component as a convenient way to load data when an element becomes visible in the viewport. The `WhenVisible` component accepts a `data` prop that specifies the key of the prop to load. It also accepts a `fallback` prop that specifies a component to render while the data is loading. The `WhenVisible` component should wrap the component that depends on the data. Vue: ```markup ``` React: ```jsx import { WhenVisible } from '@inertiajs/react' export default () => (
Loading...
}>
) ``` Svelte 4: ```jsx
Loading...
{#each permissions as permission} \ {/each}
``` Svelte 5: ```jsx {#snippet fallback()}
Loading...
{/snippet} {#each permissions as permission} \ {/each}
``` If you'd like to load multiple props when an element becomes visible, you can provide an array to the `data` prop. Vue: ```markup ``` React: ```jsx import { WhenVisible } from '@inertiajs/react' export default () => (
Loading...
}>
) ``` Svelte 4: ```jsx
Loading...
\
``` Svelte 5: ```jsx {#snippet fallback()}
Loading...
{/snippet} \
``` ## Loading before visible If you'd like to start loading data before the element is visible, you can provide a value to the `buffer` prop. The buffer value is a number that represents the number of pixels before the element is visible. Vue: ```markup ``` React: ```jsx import { WhenVisible } from '@inertiajs/react' export default () => (
Loading...
}>
) ``` Svelte 4: ```jsx
Loading...
{#each permissions as permission} \ {/each}
``` Svelte 5: ```jsx {#snippet fallback()}
Loading...
{/snippet} {#each permissions as permission} \ {/each}
``` In the above example, the data will start loading 500 pixels before the element is visible. By default, the `WhenVisible` component wraps the fallback template in a `div` element so it can ensure the element is visible in the viewport. If you want to customize the wrapper element, you can provide the `as` prop. Vue: ```markup ``` React: ```jsx import { WhenVisible } from '@inertiajs/react' export default () => ( ) ``` Svelte 4: ```jsx \ ``` Svelte 5: ```jsx \ ``` ## Always trigger By default, the `WhenVisible` component will only trigger once when the element becomes visible. If you want to always trigger the data loading when the element is visible, you can provide the `always`prop. This is useful when you want to load data every time the element becomes visible, such as when the element is at the end of an infinite scroll list and you want to load more data. Note that if the data loading request is already in flight, the component will wait until it is finished to start the next request if the element is still visible in the viewport. Vue: ```markup ``` React: ```jsx import { WhenVisible } from '@inertiajs/react' export default () => ( ) ``` Svelte 4: ```jsx \ ``` Svelte 5: ```jsx \ ``` # Remembering state When navigating browser history, Inertia restores pages using prop data cached in history state. However, Inertia does not restore local page component state since this is beyond its reach. This can lead to outdated pages in your browser history. For example, if a user partially completes a form, then navigates away, and then returns back, the form will be reset and their work will be lost. To mitigate this issue, you can tell Inertia which local component state to save in the browser history. ## Saving local state To save local component state to the history state, use the `useRemember` feature to tell Inertia which data it should remember. Vue (Use the "useRemember" hook to tell Inertia which data it should remember.): ```js import { useRemember } from '@inertiajs/vue3' const form = useRemember({ first_name: null, last_name: null, }) ``` React (Use the "useRemember" hook to tell Inertia which data it should remember.): ```jsx import { useRemember } from '@inertiajs/react' export default function Profile() { const [formState, setFormState] = useRemember({ first_name: null, last_name: null, // ... }) // ... } ``` Svelte (Use the "useRemember" store to tell Inertia which data it should remember.): ```js import { useRemember } from '@inertiajs/svelte' const form = useRemember({ first_name: null, last_name: null, }) // ... ``` Now, whenever your local `form` state changes, Inertia will automatically save this data to the history state and will also restore it on history navigation. ## Multiple components If your page contains multiple components that use the remember functionality provided by Inertia, you need to provide a unique key for each component so that Inertia knows which data to restore to each component. Vue (Set a key as the second argument of useRemember().): ```js import { useRemember } from '@inertiajs/vue3' const form = useRemember({ first_name: null, last_name: null, }, 'Users/Create') ``` React (Set a key as the second argument of useRemember().): ```jsx import { useRemember } from '@inertiajs/react' export default function Profile() { const [formState, setFormState] = useRemember({ first_name: null, last_name: null, }, 'Users/Create') } ``` Svelte (Set a key as the second argument of useRemember().): ```js import { page, useRemember } from '@inertiajs/svelte' const form = useRemember({ first_name: null, last_name: null, }, 'Users/Create') ``` If you have multiple instances of the same component on the page using the remember functionality, be sure to also include a unique key for each component instance, such as a model identifier. Vue (Set a dynamic key as the second argument of useRemember().): ```js import { useRemember } from '@inertiajs/vue3' const props = defineProps({ user: Object }) const form = useRemember({ first_name: null, last_name: null, }, \`Users/Edit:\${props.user.id}\`) ``` React (Set a dynamic key as the second argument of useRemember().): ```jsx import { useRemember } from '@inertiajs/react' export default function Profile() { const [formState, setFormState] = useRemember({ first_name: props.user.first_name, last_name: props.user.last_name, }, \`Users/Edit:\${this.user.id}\`) } ``` Svelte (Set a dynamic key as the second argument of useRemember().): ```js import { page, useRemember } from '@inertiajs/svelte' const form = useRemember({ first_name: $page.props.user.first_name, last_name: $page.props.user.last_name, }, \`Users/Edit:\${$page.props.user.id}\`) ``` ## Form helper If you're using the [Inertia form helper](/forms#form-helper), you can pass a unique form key as the first argument when instantiating your form. This will cause the form data and errors to automatically be remembered. Vue: ```js import { useForm } from '@inertiajs/vue3' const form = useForm('CreateUser', data) const form = useForm(\`EditUser:\${props.user.id}\ ``` React: ```js import { useForm } from '@inertiajs/react' const form = useForm('CreateUser', data) const form = useForm(\`EditUser:\${user.id}\ ``` Svelte: ```js import { useForm } from '@inertiajs/svelte' const form = useForm('CreateUser', data) const form = useForm(\`EditUser:\${user.id}\ ``` ## Manually saving state The `useRemember` hook watches for data changes and automatically saves those changes to the history state. Then, Inertia will restore the data on page load. However, it's also possible to manage this manually using the underlying `remember()` and `restore()` methods exposed by Inertia. Vue: ```js import { router } from '@inertiajs/vue3' // Save local component state to history state router.remember(data, 'my-key') // Restore local component state from history state let data = router.restore('my-key') ``` React: ```js import { router } from '@inertiajs/react' // Save local component state to history state router.remember(data, 'my-key') // Restore local component state from history state let data = router.restore('my-key') ``` Svelte: ```js import { router } from '@inertiajs/svelte' // Save local component state to history state router.remember(data, 'my-key') // Restore local component state from history state let data = router.restore('my-key') ``` # Authentication One of the benefits of using Inertia is that you don't need a special authentication system such as OAuth to connect to your data provider (API). Also, since your data is provided via your controllers, and housed on the same domain as your JavaScript components, you don't have to worry about setting up CORS. Rather, when using Inertia, you can simply use whatever authentication system your server-side framework ships with. Typically, this will be a session based authentication system such as the authentication system included with Laravel. Laravel's [starter kits](https://laravel.com/docs/starter-kits) provide out-of-the-box scaffolding for new Inertia applications, including authentication. # Authorization When using Inertia, authorization is best handled server-side in your application's authorization policies. However, you may be wondering how to perform checks against your authorization policies from within your Inertia page components since you won't have access to your framework's server-side helpers. The simplest approach to solving this problem is to pass the results of your authorization checks as props to your page components. Laravel: ```php class UsersController extends Controller { public function index() { return Inertia::render('Users/Index', [ 'can' => [ 'create_user' => Auth::user()->can('create', User::class), ], 'users' => User::all()->map(function ($user) { return [ 'first_name' => $user->first_name, 'last_name' => $user->last_name, 'email' => $user->email, 'can' => [ 'edit_user' => Auth::user()->can('edit', $user), ] ]; }), ]); } } ``` # CSRF protection ## Making requests Laravel automatically includes the proper CSRF token when making requests via Inertia or Axios. However, if you're using Laravel, be sure to omit the `csrf-token` meta tag from your project, as this will prevent the CSRF token from refreshing properly. If your server-side framework includes cross-site request forgery (CSRF) protection, you'll need to ensure that each Inertia request includes the necessary CSRF token for `POST`, `PUT`, `PATCH`, and `DELETE` requests. Of course, as already discussed, some server-side frameworks such as Laravel automatically handle the inclusion of the CSRF token when making requests. **Therefore, no additional configuration is required when using one of these frameworks.** However, if you need to handle CSRF protection manually, one approach is to include the CSRF token as a prop on every response. You can then use the token when making Inertia requests. Vue: ```js import { router, usePage } from '@inertiajs/vue3' const page = usePage() router.post('/users', { _token: page.props.csrf_token, name: 'John Doe', email: 'john.doe@example.com', }) ``` React: ```js import { router, usePage } from '@inertiajs/react' const props = usePage().props router.post('/users', { _token: props.csrf_token, name: 'John Doe', email: 'john.doe@example.com', }) ``` Svelte: ```js import { page, router } from '@inertiajs/svelte' router.post('/users', { _token: $page.props.csrf_token, name: 'John Doe', email: 'john.doe@example.com', }) ``` You can even use Inertia's [shared data](/shared-data) functionality to automatically include the `csrf_token` with each response. However, a better approach is to use the CSRF functionality already built into [axios](https://github.com/axios/axios) for this. Axios is the HTTP library that Inertia uses under the hood. Axios automatically checks for the existence of an `XSRF-TOKEN` cookie. If it's present, it will then include the token in an `X-XSRF-TOKEN` header for any requests it makes. The easiest way to implement this is using server-side middleware. Simply include the `XSRF-TOKEN`cookie on each response, and then verify the token using the `X-XSRF-TOKEN` header sent in the requests from axios. ## Handling mismatches When a CSRF token mismatch occurs, your server-side framework will likely throw an exception that results in an error response. For example, when using Laravel, a `TokenMismatchException` is thrown which results in a `419` error page. Since that isn't a valid Inertia response, the error is shown in a modal. Obviously, this isn't a great user experience. A better way to handle these errors is to return a redirect back to the previous page, along with a flash message that the page expired. This will result in a valid Inertia response with the flash message available as a prop which you can then display to the user. Of course, you'll need to share your [flash messages](/shared-data#flash-messages) with Inertia for this to work. When using Laravel, you may modify your application's exception handler to automatically redirect the user back to the page they were previously on while flashing a message to the session. To accomplish this, you may use the `respond` exception method in your application's `bootstrap/app.php` file. Laravel: ```php use Symfony\\Component\\HttpFoundation\\Response; ->withExceptions(function (Exceptions $exceptions) { $exceptions->respond(function (Response $response) { if ($response->getStatusCode() === 419) { return back()->with([ 'message' => 'The page expired, please try again.', ]); } return $response; }); }); ``` The end result is a much better experience for your users. Instead of seeing the error modal, the user is instead presented with a message that the page "expired" and are asked to try again. # History encryption Imagine a scenario where your user is authenticated, browses privileged information on your site, then logs out. If they press the back button, they can still see the privileged information that is stored in the window's history state. This is a security risk. To prevent this, Inertia.js provides a history encryption feature. ## How it works When you instruct Inertia to encrypt your app's history, it uses the browser's built-in [`crypto` api ](https://developer.mozilla.org/en-US/docs/Web/API/Crypto)to encrypt the current page's data before pushing it to the history state. We store the corresponding key in the browser's session storage. When the user navigates back to a page, we decrypt the data using the key stored in the session storage. Once you instruct Inertia to clear your history state, we simply clear the existing key from session storage roll a new one. If we attempt to decrypt the history state with the new key, it will fail and Inertia will make a fresh request back to your server for the page data. History encryption relies on `window.crypto.subtle` which is only available in secure environments (sites with SSL enabled). ## Opting in History encryption is an opt-in feature. There are several methods for enabling it: ### Global encryption If you'd like to enable history encryption globally, set the `inertia.history.encrypt` config value to `true`. You are able to opt out of encryption on specific pages by calling the `Inertia::encryptHistory()` method before returning the response. Laravel: ```php Inertia::encryptHistory(false); ``` ### Per-request encryption To encrypt the history of an individual request, simply call the `Inertia::encryptHistory()` method before returning the response. Laravel: ```php Inertia::encryptHistory(); ``` ### Encrypt middleware To encrypt a group of routes, you may use Inertia's included `EncryptHistory` middleware. Laravel: ```php Route::middleware([Inertia\\Middleware\\EncryptHistory::class])->get('/', function() { // }); Route::middleware(['inertia::encrypt'])->get('/', function() { // }); ``` ## Clearing history To clear the history state, you can call the `Inertia::clearHistory()` method before returning the response. Laravel: ```php Inertia::clearHistory(); ``` Once the response has rendered on the client, the encryption key will be rotated, rendering the previous history state unreadable. You can also clear history on the client site by calling `router.clearHistory()`. # Asset versioning One common challenge when building single-page apps is refreshing site assets when they've been changed. Thankfully, Inertia makes this easy by optionally tracking the current version of your site assets. When an asset changes, Inertia will automatically make a full page visit instead of a XHR visit on the next request. ## Configuration To enable automatic asset refreshing, you need to tell Inertia the current version of your assets. This can be any arbitrary string (letters, numbers, or a file hash), as long as it changes when your assets have been updated. Typically, your application's asset version can be specified within the `version` method of the Inertia `HandleInertiaRequests` middleware. Laravel: ```php class HandleInertiaRequests extends Middleware { public function version(Request $request) { return parent::version($request); } } ``` Alternatively, the asset version can be provided manually using the `Inertia::version()` method. Laravel: ```php use Inertia\\Inertia; Inertia::version($version); Inertia::version(fn () => $version); // Lazily... ``` ## Cache busting Asset refreshing in Inertia works on the assumption that a hard page visit will trigger your assets to reload. However, Inertia doesn't actually do anything to force this. Typically this is done with some form of cache busting. For example, appending a version query parameter to the end of your asset URLs. With Laravel's Vite integration, asset versioning is done automatically. If you're using Laravel Mix, you can do this automatically by enabling [versioning](https://laravel.com/docs/mix#versioning-and-cache-busting) in your `webpack.mix.js` file. ## Manual refreshing If you want to take asset refreshing into your control, you can return a fixed value from the `version` method in the `HandleInertiaRequests` middleware. This disables Inertia's automatic asset versioning. For example, if you want to notify users when a new version of your frontend is available, you can still expose the actual asset version to the frontend by including it as [shared data](/shared-data). ```php class HandleInertiaRequests extends Middleware { public function version(Request $request) { return null; } public function share(Request $request) { return array_merge(parent::share($request), [ 'version' => parent::version($request), ]); } } ``` On the frontend, you can watch the `version` property and show a notification when a new version is detected. # Code splitting Code splitting breaks apart the various pages of your application into smaller bundles, which are then loaded on demand when visiting new pages. This can significantly reduce the size of the initial JavaScript bundle loaded by the browser, improving the time to first render. While code splitting is helpful for very large projects, it does require extra requests when visiting new pages. Generally speaking, if you're able to use a single bundle, your app is going to feel snappier. To enable code splitting, you will need to tweak the `resolve` callback in your `createInertiaApp()` configuration, and how you do this is different depending on which bundler you're using. ## Using Vite Vite enables code splitting (or lazy-loading as they call it) by default when using their `import.meta.glob()` function, so simply omit the `{`{ eager: true }`}` option, or set it to `false`, to disable eager loading. Vue: ```diff resolve: name => { \- const pages = import.meta.glob('./Pages/**/*.vue', { eager: true }) \- return pages[\`./Pages/\${name}.vue\`] \+ const pages = import.meta.glob('./Pages/**/*.vue') \+ return pages[\`./Pages/\${name}.vue\`]() }, ``` React: ```diff resolve: name => { \- const pages = import.meta.glob('./Pages/**/*.jsx', { eager: true }) \- return pages[\`./Pages/\${name}.jsx\`] \+ const pages = import.meta.glob('./Pages/**/*.jsx') \+ return pages[\`./Pages/\${name}.jsx\`]() }, ``` Svelte: ```diff resolve: name => { \- const pages = import.meta.glob('./Pages/**/*.svelte', { eager: true }) \- return pages[\`./Pages/\${name}.svelte\`] \+ const pages = import.meta.glob('./Pages/**/*.svelte') \+ return pages[\`./Pages/\${name}.svelte\`]() }, ``` ## Using Webpack To use code splitting with Webpack, you will first need to enable [dynamic imports](https://github.com/tc39/proposal-dynamic-import) via a Babel plugin. Let's install it now. ```bash npm install @babel/plugin-syntax-dynamic-import ``` Next, create a `.babelrc` file in your project with the following configuration: ```json { "plugins": ["@babel/plugin-syntax-dynamic-import"] } ``` If you're using Laravel Mix, the dynamic imports Babel plugin is already installed and configured, and you can skip these steps. We recommend using Laravel Mix 6 or above, as there are known issues with older versions. Finally, update the `resolve` callback in your app's initialization code to use `import`instead of `require`. Vue: ```diff \- resolve: name => require(\`./Pages/\${name}\`), \+ resolve: name => import(\`./Pages/\${name}\`), ``` React: ```diff \- resolve: name => require(\`./Pages/\${name}\`), \+ resolve: name => import(\`./Pages/\${name}\`), ``` Svelte: ```diff \- resolve: name => require(\`./Pages/\${name}.svelte\`), \+ resolve: name => import(\`./Pages/\${name}.svelte\`), ``` You should also consider using cache busting to force browsers to load the latest version of your assets. To accomplish this, add the following configuration to your webpack configuration file. ```js output: { chunkFilename: 'js/[name].js?id=[chunkhash]', } ``` # Error handling ## Development One of the advantages to working with a robust server-side framework is the built-in exception handling you get for free. For example, Laravel ships with a beautiful error reporting tool which displays a nicely formatted stack trace in local development. The challenge is, if you're making an XHR request (which Inertia does) and you hit a server-side error, you're typically left digging through the network tab in your browser's devtools to diagnose the problem. Inertia solves this issue by showing all non-Inertia responses in a modal. This means you get the same beautiful error-reporting you're accustomed to, even though you've made that request over XHR. ## Production In production you will want to return a proper Inertia error response instead of relying on the modal-driven error reporting that is present during development. To accomplish this, you'll need to update your framework's default exception handler to return a custom error page. When building Laravel applications, you can accomplish this by using the `respond` exception method in your application's `bootstrap/app.php` file. Laravel: ```php use Illuminate\\Http\\Request; use Symfony\\Component\\HttpFoundation\\Response; use Inertia\\Inertia; ->withExceptions(function (Exceptions $exceptions) { $exceptions->respond(function (Response $response, Throwable $exception, Request $request) { if (! app()->environment(['local', 'testing']) && in_array($response->getStatusCode(), [500, 503, 404, 403])) { return Inertia::render('ErrorPage', ['status' => $response->getStatusCode()]) ->toResponse($request) ->setStatusCode($response->getStatusCode()); } elseif ($response->getStatusCode() === 419) { return back()->with([ 'message' => 'The page expired, please try again.', ]); } return $response; }); }) ``` You may have noticed we're returning an `ErrorPage` page component in the example above. You'll need to actually create this component, which will serve as the generic error page for your application. Here's an example error component you can use as a starting point. Vue: ```markup ``` React: ```jsx export default function ErrorPage({ status }) { const title = { 503: '503: Service Unavailable', 500: '500: Server Error', 404: '404: Page Not Found', 403: '403: Forbidden', }[status] const description = { 503: 'Sorry, we are doing some maintenance. Please check back soon.', 500: 'Whoops, something went wrong on our servers.', 404: 'Sorry, the page you are looking for could not be found.', 403: 'Sorry, you are forbidden from accessing this page.', }[status] return (

{title}

{description}
) } ``` Svelte 4: ```jsx

{title}

{description}
``` Svelte 5: ```jsx

{titles[status]}

{description[status]}
``` # Events Inertia provides an event system that allows you to "hook into" the various lifecycle events of the library. ## Registering listeners To register an event listener, use the `router.on()` method. Vue: ```js import { router } from '@inertiajs/vue3' router.on('start', (event) => { console.log(\`Starting a visit to \${event.detail.visit.url}\`) }) ``` React: ```jsx import { router } from '@inertiajs/react' router.on('start', (event) => { console.log(\`Starting a visit to \${event.detail.visit.url}\`) }) ``` Svelte: ```js import { router } from '@inertiajs/svelte' router.on('start', (event) => { console.log(\`Starting a visit to \${event.detail.visit.url}\`) }) ``` Under the hood, Inertia uses native browser events, so you can also interact with Inertia events using the typical event methods you may already be familiar with - just be sure to prepend `inertia:` to the event name. Vue: ```js import { router } from '@inertiajs/vue3' document.addEventListener('inertia:start', (event) => { console.log(\`Starting a visit to \${event.detail.visit.url}\`) }) ``` React: ```jsx import { router } from '@inertiajs/react' document.addEventListener('inertia:start', (event) => { console.log(\`Starting a visit to \${event.detail.visit.url}\`) }) ``` Svelte: ```js import { router } from '@inertiajs/svelte' document.addEventListener('inertia:start', (event) => { console.log(\`Starting a visit to \${event.detail.visit.url}\`) }) ``` ## Removing listeners When you register an event listener, Inertia automatically returns a callback that can be invoked to remove the event listener. Vue: ```js import { router } from '@inertiajs/vue3' let removeStartEventListener = router.on('start', (event) => { console.log(\`Starting a visit to \${event.detail.visit.url}\`) }) // Remove the listener... removeStartEventListener() ``` React: ```jsx import { router } from '@inertiajs/react' let removeStartEventListener = router.on('start', (event) => { console.log(\`Starting a visit to \${event.detail.visit.url}\`) }) // Remove the listener... removeStartEventListener() ``` Svelte: ```js import { router } from '@inertiajs/svelte' let removeStartEventListener = router.on('start', (event) => { console.log(\`Starting a visit to \${event.detail.visit.url}\`) }) // Remove the listener... removeStartEventListener() ``` Combined with hooks, you can automatically remove the event listener when components unmount. Vue: ```jsx import { router } from '@inertiajs/vue3' import { onUnmounted } from 'vue' onUnmounted( router.on('start', (event) => { console.log(\`Starting a visit to \${event.detail.visit.url}\`) }) ) ``` React: ```jsx import { useEffect } from 'react' import { router } from '@inertiajs/react' useEffect(() => { return router.on('start', (event) => { console.log(\`Starting a visit to \${event.detail.visit.url}\`) }) }, []) ``` Svelte 4: ```js import { router } from '@inertiajs/svelte' import { onMount } from 'svelte' onMount(() => { return router.on('start', (event) => { console.log(\`Starting a visit to \${event.detail.visit.url}\`) }) }) ``` Svelte 5: ```js import { router } from '@inertiajs/svelte' $effect(() => { return router.on('start', (event) => { console.log(\`Starting a visit to \${event.detail.visit.url}\`) }) }) ``` Alternatively, if you're using native browser events, you can remove the event listener using `removeEventListener()`. Vue: ```js import { router } from '@inertiajs/vue3' let startEventListener = (event) => { console.log(\`Starting a visit to \${event.detail.visit.url}\`) } document.addEventListener('inertia:start', startEventListener) // Remove the listener... document.removeEventListener('inertia:start', startEventListener) ``` React: ```jsx import { router } from '@inertiajs/react' let startEventListener = (event) => { console.log(\`Starting a visit to \${event.detail.visit.url}\`) } document.addEventListener('inertia:start', startEventListener) // Remove the listener... document.removeEventListener('inertia:start', startEventListener) ``` Svelte: ```js import { router } from '@inertiajs/svelte' let startEventListener = (event) => { console.log(\`Starting a visit to \${event.detail.visit.url}\`) } document.addEventListener('inertia:start', startEventListener) // Remove the listener... document.removeEventListener('inertia:start', startEventListener) ``` ## Cancelling events Some events, such as `before`, `exception`, and `invalid`, support cancellation, allowing you to prevent Inertia's default behavior. Just like native events, the event will be cancelled if only one event listener calls `event.preventDefault()`. Vue: ```js import { router } from '@inertiajs/vue3' router.on('before', (event) => { if (!confirm('Are you sure you want to navigate away?')) { event.preventDefault() } }) ``` React: ```jsx import { router } from '@inertiajs/react' router.on('before', (event) => { if (!confirm('Are you sure you want to navigate away?')) { event.preventDefault() } }) ``` Svelte: ```js import { router } from '@inertiajs/svelte' router.on('before', (event) => { if (!confirm('Are you sure you want to navigate away?')) { event.preventDefault() } }) ``` For convenience, if you register your event listener using `router.on()`, you can cancel the event by returning `false` from the listener. Vue: ```js import { router } from '@inertiajs/vue3' router.on('before', (event) => { return confirm('Are you sure you want to navigate away?') }) ``` React: ```jsx import { router } from '@inertiajs/react' router.on('before', (event) => { return confirm('Are you sure you want to navigate away?') }) ``` Svelte: ```js import { router } from '@inertiajs/svelte' router.on('before', (event) => { return confirm('Are you sure you want to navigate away?') }) ``` Note, browsers do not allow cancelling the native `popstate` event, so preventing forward and back history visits while using Inertia.js is not possible. ## Before The `before` event fires when a request is about to be made to the server. This is useful for intercepting visits. Vue: ```js import { router } from '@inertiajs/vue3' router.on('before', (event) => { console.log(\`About to make a visit to \${event.detail.visit.url}\`) }) ``` React: ```jsx import { router } from '@inertiajs/react' router.on('before', (event) => { console.log(\`About to make a visit to \${event.detail.visit.url}\`) }) ``` Svelte: ```js import { router } from '@inertiajs/svelte' router.on('before', (event) => { console.log(\`About to make a visit to \${event.detail.visit.url}\`) }) ``` The primary purpose of this event is to allow you to prevent a visit from happening. Vue: ```js import { router } from '@inertiajs/vue3' router.on('before', (event) => { return confirm('Are you sure you want to navigate away?') }) ``` React: ```jsx import { router } from '@inertiajs/react' router.on('before', (event) => { return confirm('Are you sure you want to navigate away?') }) ``` Svelte: ```js import { router } from '@inertiajs/svelte' router.on('before', (event) => { return confirm('Are you sure you want to navigate away?') }) ``` ## Start The `start` event fires when a request to the server has started. This is useful for displaying loading indicators. Vue: ```js import { router } from '@inertiajs/vue3' router.on('start', (event) => { console.log(\`Starting a visit to \${event.detail.visit.url}\`) }) ``` React: ```jsx import { router } from '@inertiajs/react' router.on('start', (event) => { console.log(\`Starting a visit to \${event.detail.visit.url}\`) }) ``` Svelte: ```js import { router } from '@inertiajs/svelte' router.on('start', (event) => { console.log(\`Starting a visit to \${event.detail.visit.url}\`) }) ``` The `start` event is not cancelable. ## Progress The `progress` event fires as progress increments during file uploads. Vue: ```js import { router } from '@inertiajs/vue3' router.on('progress', (event) => { this.form.progress = event.detail.progress.percentage }) ``` React: ```jsx import { router } from '@inertiajs/react' router.on('progress', (event) => { this.form.progress = event.detail.progress.percentage }) ``` Svelte: ```js import { router } from '@inertiajs/svelte' router.on('progress', (event) => { this.form.progress = event.detail.progress.percentage }) ``` The `progress` event is not cancelable. ## Success The `success` event fires on successful page visits, unless validation errors are present. However, this does *not* include history visits. Vue: ```js import { router } from '@inertiajs/vue3' router.on('success', (event) => { console.log(\`Successfully made a visit to \${event.detail.page.url}\`) }) ``` React: ```jsx import { router } from '@inertiajs/react' router.on('success', (event) => { console.log(\`Successfully made a visit to \${event.detail.page.url}\`) }) ``` Svelte: ```js import { router } from '@inertiajs/svelte' router.on('success', (event) => { console.log(\`Successfully made a visit to \${event.detail.page.url}\`) }) ``` The `success` event is not cancelable. ## Error The `error` event fires when validation errors are present on "successful" page visits. Vue: ```js import { router } from '@inertiajs/vue3' router.on('error', (errors) => { console.log(errors) }) ``` React: ```jsx import { router } from '@inertiajs/react' router.on('error', (errors) => { console.log(errors) }) ``` Svelte: ```js import { router } from '@inertiajs/svelte' router.on('error', (errors) => { console.log(errors) }) ``` The `error` event is not cancelable. ## Invalid The `invalid` event fires when a non-Inertia response is received from the server, such as an HTML or vanilla JSON response. A valid Inertia response is a response that has the `X-Inertia` header set to `true` with a `json` payload containing [the page object](/the-protocol#the-page-object). This event is fired for all response types, including `200`, `400`, and `500`response codes. Vue: ```js import { router } from '@inertiajs/vue3' router.on('invalid', (event) => { console.log(\`An invalid Inertia response was received.\`) console.log(event.detail.response) }) ``` React: ```jsx import { router } from '@inertiajs/react' router.on('invalid', (event) => { console.log(\`An invalid Inertia response was received.\`) console.log(event.detail.response) }) ``` Svelte: ```js import { router } from '@inertiajs/svelte' router.on('invalid', (event) => { console.log(\`An invalid Inertia response was received.\`) console.log(event.detail.response) }) ``` You may cancel the `invalid` event to prevent Inertia from showing the non-Inertia response modal. Vue: ```js import { router } from '@inertiajs/vue3' router.on('invalid', (event) => { event.preventDefault() // Handle the invalid response yourself... }) ``` React: ```jsx import { router } from '@inertiajs/react' router.on('invalid', (event) => { event.preventDefault() // Handle the invalid response yourself... }) ``` Svelte: ```js import { router } from '@inertiajs/svelte' router.on('invalid', (event) => { event.preventDefault() // Handle the invalid response yourself... }) ``` ## Exception The `exception` event fires on unexpected XHR errors such as network interruptions. In addition, this event fires for errors generated when resolving page components. Vue: ```js import { router } from '@inertiajs/vue3' router.on('exception', (event) => { console.log(\`An unexpected error occurred during an Inertia visit.\`) console.log(event.detail.error) }) ``` React: ```jsx import { router } from '@inertiajs/react' router.on('exception', (event) => { console.log(\`An unexpected error occurred during an Inertia visit.\`) console.log(event.detail.error) }) ``` Svelte: ```js import { router } from '@inertiajs/svelte' router.on('exception', (event) => { console.log(\`An unexpected error occurred during an Inertia visit.\`) console.log(event.detail.error) }) ``` You may cancel the `exception` event to prevent the error from being thrown. Vue: ```js import { router } from '@inertiajs/vue3' router.on('exception', (event) => { event.preventDefault() // Handle the error yourself }) ``` React: ```jsx import { router } from '@inertiajs/react' router.on('exception', (event) => { event.preventDefault() // Handle the error yourself }) ``` Svelte: ```js import { router } from '@inertiajs/svelte' router.on('exception', (event) => { event.preventDefault() // Handle the error yourself }) ``` This event will *not* fire for XHR requests that receive `400` and `500` level responses or for non-Inertia responses, as these situations are handled in other ways by Inertia. Please consult the [error handling documentation](/error-handling) for more information. ## Finish The `finish` event fires after an XHR request has completed for both "successful" and "unsuccessful" responses. This event is useful for hiding loading indicators. Vue: ```js import { router } from '@inertiajs/vue3' router.on('finish', (event) => { NProgress.done() }) ``` React: ```jsx import { router } from '@inertiajs/react' router.on('finish', (event) => { NProgress.done() }) ``` Svelte: ```js import { router } from '@inertiajs/svelte' router.on('finish', (event) => { NProgress.done() }) ``` The `finish` event is not cancelable. ## Navigate The `navigate` event fires on successful page visits, as well as when navigating through history. Vue: ```js import { router } from '@inertiajs/vue3' router.on('navigate', (event) => { console.log(\`Navigated to \${event.detail.page.url}\`) }) ``` React: ```jsx import { router } from '@inertiajs/react' router.on('navigate', (event) => { console.log(\`Navigated to \${event.detail.page.url}\`) }) ``` Svelte: ```js import { router } from '@inertiajs/svelte' router.on('navigate', (event) => { console.log(\`Navigated to \${event.detail.page.url}\`) }) ``` The `navigate` event is not cancelable. ## Prefetching The `prefetching` event fires when the router starts prefetching a page. Vue: ```js import { router } from '@inertiajs/vue3' router.on('prefetching', (event) => { console.log(\`Prefetching \${event.detail.page.url}\`) }) ``` React: ```jsx import { router } from '@inertiajs/react' router.on('prefetching', (event) => { console.log(\`Prefetching \${event.detail.page.url}\`) }) ``` Svelte: ```js import { router } from '@inertiajs/svelte' router.on('prefetching', (event) => { console.log(\`Prefetching \${event.detail.page.url}\`) }) ``` The `prefetching` event is not cancelable. ## Prefetched The `prefetched` event fires when the router has successfully prefetched a page. Vue: ```js import { router } from '@inertiajs/vue3' router.on('prefetched', (event) => { console.log(\`Prefetched \${event.detail.page.url}\`) }) ``` React: ```jsx import { router } from '@inertiajs/react' router.on('prefetched', (event) => { console.log(\`Prefetched \${event.detail.page.url}\`) }) ``` Svelte: ```js import { router } from '@inertiajs/svelte' router.on('prefetched', (event) => { console.log(\`Prefetched \${event.detail.page.url}\`) }) ``` The `prefetched` event is not cancelable. ## Event callbacks In addition to the global events described throughout this page, Inertia also provides a number of [event callbacks](/manual-visits#event-callbacks) that fire when manually making Inertia visits. # Progress indicators Since Inertia requests are made via XHR, there would typically not be a browser loading indicator when navigating from one page to another. To solve this, Inertia displays a progress indicator at the top of the page whenever you make an Inertia visit. However, [asynchronous requests](#visit-options) do not show the progress indicator unless explicitly configured. Of course, if you prefer, you can disable Inertia's default loading indicator and provide your own custom implementation. We'll discuss both approaches below. ## Default Inertia's default progress indicator is a light-weight wrapper around the [NProgress](https://ricostacruz.com/nprogress/) library. You can customize it via the `progress` property of the `createInertiaApp()` function. ```js createInertiaApp({ progress: { // The delay after which the progress bar will appear, in milliseconds... delay: 250, // The color of the progress bar... color: '#29d', // Whether to include the default NProgress styles... includeCSS: true, // Whether the NProgress spinner will be shown... showSpinner: false, }, // ... }) ``` You can disable Inertia's default loading indicator by setting the `progress` property to `false`. ```js createInertiaApp({ progress: false, // ... }) ``` ## Custom It's also possible to setup your own custom page loading indicators using Inertia [events](/events). Let's explore how to do this using the [NProgress](https://ricostacruz.com/nprogress/) library as an example. First, disable Inertia's default loading indicator. ```js createInertiaApp({ progress: false, // ... }) ``` Next, install the NProgress library. ```bash npm install nprogress ``` After installation, you'll need to add the NProgress [styles](https://github.com/rstacruz/nprogress/blob/master/nprogress.css) to your project. You can do this using a CDN hosted copy of the styles. ```html ``` Then, import both `NProgress` and the Inertia `router` into your application. Vue: ```js import NProgress from 'nprogress' import { router } from '@inertiajs/vue3' ``` React: ```js import NProgress from 'nprogress' import { router } from '@inertiajs/react' ``` Svelte: ```js import NProgress from 'nprogress' import { router } from '@inertiajs/svelte' ``` Next, add a `start` event listener. We'll use this listener to show the progress bar when a new Inertia visit begins. ```js router.on('start', () => NProgress.start()) ``` Finally, add a `finish` event listener to hide the progress bar when the page visit finishes. ```js router.on('finish', () => NProgress.done()) ``` That's it! Now, as you navigate from one page to another, the progress bar will be added and removed from the page. ### Handling cancelled visits While this custom progress implementation works great for page visits that finish properly, it would be nice to handle cancelled visits as well. First, for interrupted visits (those that get cancelled as a result of a new visit), the progress bar should simply be reset back to the start position. Second, for manually cancelled visits, the progress bar should be immediately removed from the page. We can accomplish this by inspecting the `event.detail.visit` object that's provided to the finish event. ```js router.on('finish', (event) => { if (event.detail.visit.completed) { NProgress.done() } else if (event.detail.visit.interrupted) { NProgress.set(0) } else if (event.detail.visit.cancelled) { NProgress.done() NProgress.remove() } }) ``` ### File upload progress Let's take this a step further. When files are being uploaded, it would be great to update the loading indicator to reflect the upload progress. This can be done using the `progress` event. ```js router.on('progress', (event) => { if (event.detail.progress.percentage) { NProgress.set((event.detail.progress.percentage / 100) * 0.9) } }) ``` Now, instead of the progress bar "trickling" while the files are being uploaded, it will actually update it's position based on the progress of the request. We limit the progress here to 90%, since we still need to wait for a response from the server. ### Loading indicator delay The last thing we're going to implement is a loading indicator delay. It's often preferable to delay showing the loading indicator until a request has taken longer than 250-500 milliseconds. This prevents the loading indicator from appearing constantly on quick page visits, which can be visually distracting. To implement the delay behavior, we'll use the `setTimeout` and `clearTimeout` functions. Let's start by defining a variable to keep track of the timeout. ```js let timeout = null ``` Next, let's update the `start` event listener to start a new timeout that will show the progress bar after 250 milliseconds. ```js router.on('start', () => { timeout = setTimeout(() => NProgress.start(), 250) }) ``` Next, we'll update the `finish` event listener to clear any existing timeouts in the event that the page visit finishes before the timeout does. ```js router.on('finish', (event) => { clearTimeout(timeout) // ... }) ``` In the `finish` event listener, we need to determine if the progress bar has actually started displaying progress, otherwise we'll inadvertently cause it to show before the timeout has finished. ```js router.on('finish', (event) => { clearTimeout(timeout) if (!NProgress.isStarted()) { return } // ... }) ``` And, finally, we need to do the same check in the `progress` event listener. ```js router.on('progress', event => { if (!NProgress.isStarted()) { return } // ... }) ``` That's it, you now have a beautiful custom page loading indicator! ### Complete example For convenience, here is the full source code of the final version of our custom loading indicator. Vue: ```js import NProgress from 'nprogress' import { router } from '@inertiajs/vue3' let timeout = null router.on('start', () => { timeout = setTimeout(() => NProgress.start(), 250) }) router.on('progress', (event) => { if (NProgress.isStarted() && event.detail.progress.percentage) { NProgress.set((event.detail.progress.percentage / 100) * 0.9) } }) router.on('finish', (event) => { clearTimeout(timeout) if (!NProgress.isStarted()) { return } else if (event.detail.visit.completed) { NProgress.done() } else if (event.detail.visit.interrupted) { NProgress.set(0) } else if (event.detail.visit.cancelled) { NProgress.done() NProgress.remove() } }) ``` React: ```js import NProgress from 'nprogress' import { router } from '@inertiajs/react' let timeout = null router.on('start', () => { timeout = setTimeout(() => NProgress.start(), 250) }) router.on('progress', (event) => { if (NProgress.isStarted() && event.detail.progress.percentage) { NProgress.set((event.detail.progress.percentage / 100) * 0.9) } }) router.on('finish', (event) => { clearTimeout(timeout) if (!NProgress.isStarted()) { return } else if (event.detail.visit.completed) { NProgress.done() } else if (event.detail.visit.interrupted) { NProgress.set(0) } else if (event.detail.visit.cancelled) { NProgress.done() NProgress.remove() } }) ``` Svelte: ```js import NProgress from 'nprogress' import { router } from '@inertiajs/svelte' let timeout = null router.on('start', () => { timeout = setTimeout(() => NProgress.start(), 250) }) router.on('progress', (event) => { if (NProgress.isStarted() && event.detail.progress.percentage) { NProgress.set((event.detail.progress.percentage / 100) * 0.9) } }) router.on('finish', (event) => { clearTimeout(timeout) if (!NProgress.isStarted()) { return } else if (event.detail.visit.completed) { NProgress.done() } else if (event.detail.visit.interrupted) { NProgress.set(0) } else if (event.detail.visit.cancelled) { NProgress.done() NProgress.remove() } }) ``` ## Visit Options In addition to these configurations, Inertia.js provides two visit options to control the loading indicator on a per-request basis: `showProgress` and `async`. These options offer greater control over how Inertia.js handles asynchronous requests and manages progress indicators. ### showProgress The `showProgress` option provides fine-grained control over the visibility of the loading indicator during requests. ```js router.get('/settings', {}, { showProgress: false }) ``` ### async The `async` option allows you to perform asynchronous requests without displaying the default progress indicator. It can be used in combination with the `showProgress` option. ```js // Disable the progress indicator router.get('/settings', {}, { async: true }) // Enable the progress indicator with async requests router.get('/settings', {}, { async: true, showProgress: true }) ``` # Scroll management ## Scroll resetting When navigating between pages, Inertia mimics default browser behavior by automatically resetting the scroll position of the document body (as well as any [scroll regions](#scroll-regions) you've defined) back to the top. In addition, Inertia keeps track of the scroll position of each page and automatically restores that scroll position as you navigate forward and back in history. ## Scroll preservation Sometimes it's desirable to prevent the default scroll resetting when making visits. You can disable this behavior by setting the `preserveScroll` option to `true`. Vue: ```js import { router } from '@inertiajs/vue3' router.visit(url, { preserveScroll: true }) ``` React: ```js import { router } from '@inertiajs/react' router.visit(url, { preserveScroll: true }) ``` Svelte: ```js import { router } from '@inertiajs/svelte' router.visit(url, { preserveScroll: true }) ``` If you'd like to only preserve the scroll position if the response includes validation errors, set the `preserveScroll` option to "errors". Vue: ```js import { router } from '@inertiajs/vue3' router.visit(url, { preserveScroll: 'errors' }) ``` React: ```js import { router } from '@inertiajs/react' router.visit(url, { preserveScroll: 'errors' }) ``` Svelte: ```js import { router } from '@inertiajs/svelte' router.visit(url, { preserveScroll: 'errors' }) ``` You can also lazily evaluate the `preserveScroll` option based on the response by providing a callback. Vue: ```js import { router } from '@inertiajs/vue3' router.post('/users', data, { preserveScroll: (page) => page.props.someProp === 'value', }) ``` React: ```js import { router } from '@inertiajs/react' router.post('/users', data, { preserveScroll: (page) => page.props.someProp === 'value', }) ``` Svelte: ```js import { router } from '@inertiajs/svelte' router.post('/users', data, { preserveScroll: (page) => page.props.someProp === 'value', }) ``` When using an [Inertia link](/links), you can preserve the scroll position using the `preserveScroll` prop. Vue: ```jsx import { Link } from '@inertiajs/vue3' Home ``` React: ```jsx import { Link } from '@inertiajs/react' Home ``` Svelte: ```jsx import { inertia, Link } from '@inertiajs/svelte' Home Home ``` ## Scroll regions If your app doesn't use document body scrolling, but instead has scrollable elements (using the `overflow` CSS property), scroll resetting will not work. In these situations, you must tell Inertia which scrollable elements to manage by adding the `scroll-region` attribute to the element. ```html
\
``` # Server-side Rendering (SSR) Server-side rendering pre-renders your JavaScript pages on the server, allowing your visitors to receive fully rendered HTML when they visit your application. Since fully rendered HTML is served by your application, it's also easier for search engines to index your site. Server-side rendering uses Node.js to render your pages in a background process; therefore, Node must be available on your server for server-side rendering to function properly. ## Laravel starter kits If you are using [Laravel Starter Kits](https://laravel.com/docs/starter-kits), Inertia SSR is [supported](https://laravel.com/docs/starter-kits#inertia-ssr) through a build command: Laravel: ```bash npm run build:ssr ``` ## Install dependencies If you are not using a Laravel starter kit and would like to manually configure SSR, we'll first install the additional dependencies required for server-side rendering. This is only necessary for the Vue adapters, so you can skip this step if you're using React or Svelte. Vue: ```bash npm install @vue/server-renderer ``` React: ```js // No additional dependencies required ``` Svelte: ```js // No additional dependencies required ``` ## Add server entry-point Next, we'll create a `resources/js/ssr.js` file within our Laravel project that will serve as our SSR entry point. ```bash touch resources/js/ssr.js ``` This file is going to look very similar to your `resources/js/app.js` file, except it's not going to run in the browser, but rather in Node.js. Here's a complete example. Vue: ```js import { createInertiaApp } from '@inertiajs/vue3' import createServer from '@inertiajs/vue3/server' import { renderToString } from '@vue/server-renderer' import { createSSRApp, h } from 'vue' createServer(page => createInertiaApp({ page, render: renderToString, resolve: name => { const pages = import.meta.glob('./Pages/**/*.vue', { eager: true }) return pages[\`./Pages/\${name}.vue\`] }, setup({ App, props, plugin }) { return createSSRApp({ render: () => h(App, props), }).use(plugin) }, }), ) ``` React: ```jsx import { createInertiaApp } from '@inertiajs/react' import createServer from '@inertiajs/react/server' import ReactDOMServer from 'react-dom/server' createServer(page => createInertiaApp({ page, render: ReactDOMServer.renderToString, resolve: name => { const pages = import.meta.glob('./Pages/**/*.jsx', { eager: true }) return pages[\`./Pages/\${name}.jsx\`] }, setup: ({ App, props }) => , }), ) ``` Svelte 4: ```js import { createInertiaApp } from '@inertiajs/svelte' import createServer from '@inertiajs/svelte/server' createServer(page => createInertiaApp({ page, resolve: name => { const pages = import.meta.glob('./Pages/**/*.svelte', { eager: true }) return pages[\`./Pages/\${name}.svelte\`] }, setup({ App, props }) { return App.render(props) }, }), ) ``` Svelte 5: ```js import { createInertiaApp } from '@inertiajs/svelte' import createServer from '@inertiajs/svelte/server' import { render } from 'svelte/server' createServer(page => createInertiaApp({ page, resolve: name => { const pages = import.meta.glob('./Pages/**/*.svelte', { eager: true }) return pages[\`./Pages/\${name}.svelte\`] }, setup({ App, props }) { return render(App, { props }) }, }), ) ``` When creating this file, be sure to add anything that's missing from your `app.js` file that makes sense to run in SSR mode, such as plugins or custom mixins. ### Clustering By default, the SSR server will run on a single thread. Clustering starts multiple Node servers on the same port, requests are then handled by each thread in a round-robin way. You can enable clustering by passing a second argument of options to `createServer`. Vue: ```js import { createInertiaApp } from '@inertiajs/vue3' import createServer from '@inertiajs/vue3/server' import { renderToString } from '@vue/server-renderer' import { createSSRApp, h } from 'vue' createServer(page => createInertiaApp({ // ... }), { cluster: true }, ) ``` React: ```jsx import { createInertiaApp } from '@inertiajs/react' import createServer from '@inertiajs/react/server' import ReactDOMServer from 'react-dom/server' createServer(page => createInertiaApp({ // ... }), { cluster: true }, ) ``` Svelte 4: ```js import { createInertiaApp } from '@inertiajs/svelte' import createServer from '@inertiajs/svelte/server' createServer(page => createInertiaApp({ // ... }), { cluster: true }, ) ``` Svelte 5: ```js import { createInertiaApp } from '@inertiajs/svelte' import createServer from '@inertiajs/svelte/server' import { render } from 'svelte/server' createServer(page => createInertiaApp({ // ... }), { cluster: true }, ) ``` ## Setup Vite Next, we need to update our Vite configuration to build our new `ssr.js` file. We can do this by adding a `ssr` property to Laravel's Vite plugin configuration in our `vite.config.js`file. ```diff export default defineConfig({ plugins: [ laravel({ input: ['resources/css/app.css', 'resources/js/app.js'], \+ ssr: 'resources/js/ssr.js', refresh: true, }), // ... ], }) ``` ## Update npm script Next, let's update the `build` script in our `package.json` file to also build our new `ssr.js` file. ```diff "scripts": { "dev": "vite", \- "build": "vite build" \+ "build": "vite build && vite build --ssr" }, ``` Now you can build both your client-side and server-side bundles. ```bash npm run build ``` ## Running the SSR server Now that you have built both your client-side and server-side bundles, you should be able run the Node-based Inertia SSR server using the following command. ```bash php artisan inertia:start-ssr ``` You may use the `--runtime` option to specify which runtime you want to use. This allows you to switch from the default Node.js runtime to Bun. ```bash php artisan inertia:start-ssr --runtime=bun ``` With the server running, you should be able to access your app within the browser with server-side rendering enabled. In fact, you should be able to disable JavaScript entirely and still navigate around your application. ## Client side hydration Since your website is now being server-side rendered, you can instruct VueReactSvelte to "hydrate" the static markup and make it interactive instead of re-rendering all the HTML that we just generated. To enable client-side hydration in a Vue app, update your `ssr.js` file to use `createSSRApp` instead of `createApp`. To enable client-side hydration in a React app, update your `ssr.js` file to use `hydrateRoot` instead of `createRoot`. To enable client-side hydration in a Svelte 4 app, set the `hydrate` option to `true` in your `ssr.js` file. To enable client-side hydration in a Svelte 5 app, update your `ssr.js` file to use `hydrate` instead of `mount` when server rendering. Vue: ```diff \- import { createApp, h } from 'vue' \+ import { createSSRApp, h } from 'vue' import { createInertiaApp } from '@inertiajs/vue3' createInertiaApp({ resolve: name => { const pages = import.meta.glob('./Pages/**/*.vue', { eager: true }) return pages[\`./Pages/\${name}.vue\`] }, setup({ el, App, props, plugin }) { \- createApp({ render: () => h(App, props) }) \+ createSSRApp({ render: () => h(App, props) }) .use(plugin) .mount(el) }, }) ``` React: ```diff import { createInertiaApp } from '@inertiajs/react' \- import { createRoot } from 'react-dom/client' \+ import { hydrateRoot } from 'react-dom/client' createInertiaApp({ resolve: name => { const pages = import.meta.glob('./Pages/**/*.jsx', { eager: true }) return pages[\`./Pages/\${name}.jsx\`] }, setup({ el, App, props }) { \- createRoot(el).render() \+ hydrateRoot(el, ) }, }) ``` Svelte 4: ```diff import { createInertiaApp } from '@inertiajs/svelte' createInertiaApp({ resolve: name => { const pages = import.meta.glob('./Pages/**/*.svelte', { eager: true }) return pages[\`./Pages/\${name}.svelte\`] }, setup({ el, App, props }) { \- new App({ target: el, props }) \+ new App({ target: el, props, hydrate: true }) }, }) ``` Svelte 5: ```diff import { createInertiaApp } from '@inertiajs/svelte' \- import { mount } from 'svelte' \+ import { hydrate, mount } from 'svelte' createInertiaApp({ resolve: name => { const pages = import.meta.glob('./Pages/**/*.svelte', { eager: true }) return pages[\`./Pages/\${name}.svelte\`] }, setup({ el, App, props }) { \- mount(App, { target: el, props }) \+ if (el.dataset.serverRendered === 'true') { + hydrate(App, { target: el, props }) \+ } else { + mount(App, { target: el, props }) \+ } }, }) ``` You will also need to set the `hydratable` compiler option to `true` in your `vite.config.js` file: Svelte 4: ```diff import { svelte } from '@sveltejs/vite-plugin-svelte' import laravel from 'laravel-vite-plugin' import { defineConfig } from 'vite' export default defineConfig({ plugins: [ laravel.default({ input: ['resources/css/app.css', 'resources/js/app.js'], ssr: 'resources/js/ssr.js', refresh: true, }), \- svelte(), \+ svelte({ + compilerOptions: { + hydratable: true, + }, \+ }), ], }) ``` ## Deployment When deploying your SSR enabled app to production, you'll need to build both the client-side ( `app.js`) and server-side bundles (`ssr.js`), and then run the SSR server as a background process, typically using a process monitoring tool such as Supervisor. ```bash php artisan inertia:start-ssr ``` To stop the SSR server, for instance when you deploy a new version of your website, you may utilize the `inertia:stop-ssr` Artisan command. Your process monitor (such as Supervisor) should be responsible for automatically restarting the SSR server after it has stopped. ```bash php artisan inertia:stop-ssr ``` You may use the `inertia:check-ssr` Artisan command to verify that the SSR server is running. This can be helpful after deployment and works well as a Docker health check to ensure the server is responding as expected. ```bash php artisan inertia:check-ssr ``` By default, a check is performed to ensure the server-side bundle exists before dispatching a request to the SSR server. In some cases, such as when your app runs on multiple servers or is containerized, the web server may not have access to the SSR bundle. To disable this check, you may set the `inertia.ssr.ensure_bundle_exists` configuration value to `false`. ### Laravel Cloud To run the SSR server on Laravel Cloud, you may use Cloud's [native support for Inertia SSR](https://cloud.laravel.com/docs/compute#inertia-ssr). ### Laravel Forge To run the SSR server on Forge, you should create a new daemon that runs `php artisan inertia:start-ssr` from the root of your app. Or, you may utilize the built-in Inertia integration from your Forge application's management dashboard. Next, whenever you deploy your application, you can automatically restart the SSR server by calling the `php artisan inertia:stop-ssr` command. This will stop the existing SSR server, forcing a new one to be started by your process monitor. ### Heroku To run the SSR server on Heroku, update the `web` configuration in your `Procfile` to run the SSR server before starting your web server. ```bash web: php artisan inertia:start-ssr & vendor/bin/heroku-php-apache2 public/ ``` Note, you must have the `heroku/nodejs` buildpack installed in addition to the `heroku/php` buildback for the SSR server to run. # Testing There are many different ways to test an Inertia application. This page provides a quick overview of the tools available. ## End-to-end tests One popular approach to testing your JavaScript page components is to use an end-to-end testing tool like [Cypress](https://www.cypress.io/) or [Pest](https://pestphp.com). These are browser automation tools that allow you to run real simulations of your app in the browser. These tests are known to be slower; however, since they test your application at the same layer as your end users, they can provide a lot of confidence that your app is working correctly. And, since these tests are run in the browser, your JavaScript code is actually executed and tested as well. ## Client-side unit tests Another approach to testing your page components is using a client-side unit testing framework, such as [Jest](https://jestjs.io/) or [Mocha](https://mochajs.org/). This approach allows you to test your JavaScript page components in isolation using Node.js. ## Endpoint tests In addition to testing your JavaScript page components, you will likely want to also test the Inertia responses that are returned by your server-side framework. A popular approach to doing this is using endpoint tests, where you make requests to your application and examine the responses. Laravel [provides tooling](https://laravel.com/docs/http-tests) for executing these types of tests. However, to make this process even easier, Inertia's Laravel adapter provides additional HTTP testing tools. Let's take a look at an example. ```php use Inertia\\Testing\\AssertableInertia as Assert; class PodcastsControllerTest extends TestCase { public function test_can_view_podcast() { $this->get('/podcasts/41') ->assertInertia(fn (Assert $page) => $page ->component('Podcasts/Show') ->has('podcast', fn (Assert $page) => $page ->where('id', $podcast->id) ->where('subject', 'The Laravel Podcast') ->where('description', 'The Laravel Podcast brings you Laravel and PHP development news and discussion.') ->has('seasons', 4) ->has('seasons.4.episodes', 21) ->has('host', fn (Assert $page) => $page ->where('id', 1) ->where('name', 'Matt Stauffer') ) ->has('subscribers', 7, fn (Assert $page) => $page ->where('id', 2) ->where('name', 'Claudio Dekker') ->where('platform', 'Apple Podcasts') ->etc() ->missing('email') ->missing('password') ) ) ); } } ``` As you can see in the example above, you may use these assertion methods to assert against the content of the data provided to the Inertia response. In addition, you may assert that array data has a given length as well as scope your assertions. You may use the `inertiaProps` method to retrieve the props returned in the response. You can pass a key to retrieve a specific property, and nested properties are supported using "dot" notation. ```php $response = $this->get('/podcasts/41'); // Returns all props... $response->inertiaProps(); // Returns a specific prop... $response->inertiaProps('podcast'); // Returns a nested prop using "dot" notation... $response->inertiaProps('podcast.id'); ``` Let's dig into the `assertInertia` method and the available assertions in detail. First, to assert that the Inertia response has a property, you may use the `has` method. You can think of this method as being similar to PHP's `isset` function. ```php $response->assertInertia(fn (Assert $page) => $page // Checking a root-level property... ->has('podcast') // Checking nested properties using "dot" notation... ->has('podcast.id') ); ``` To assert that an Inertia property has a specified amount of items, you may provide the expected size as the second argument to the `has` method. ```php $response->assertInertia(fn (Assert $page) => $page // Checking if a root-level property has 7 items... ->has('podcasts', 7) // Checking nested properties using "dot" notation... ->has('podcast.subscribers', 7) ); ``` The `has` method may also be used to scope properties in order to lessen repetition when asserting against nested properties. ```php $response->assertInertia(fn (Assert $page) => $page // Creating a single-level property scope... ->has('message', fn (Assert $page) => $page // We can now continue chaining methods... ->has('subject') ->has('comments', 5) // And can even create a deeper scope using "dot" notation... ->has('comments.0', fn (Assert $page) => $page ->has('body') ->has('files', 1) ->has('files.0', fn (Assert $page) => $page ->has('url') ) ) ) ); ``` When scoping into Inertia properties that are arrays or collections, you may also assert that a specified number of items are present in addition to scoping into the first item. ```php $response->assertInertia(fn (Assert $page) => $page // Assert that there are 5 comments and automatically scope into the first comment... ->has('comments', 5, fn (Assert $page) => $page ->has('body') // ... ) ); ``` To assert that an Inertia property has an expected value, you may use the `where` assertion. ```php $response->assertInertia(fn (Assert $page) => $page ->has('message', fn (Assert $page) => $page // Assert that the subject prop matches the given message... ->where('subject', 'This is an example message') // Or, assert against deeply nested values... ->where('comments.0.files.0.name', 'example-attachment.pdf') ) ); ``` Inertia's testing methods will automatically fail when you haven't interacted with at least one of the props in a scope. While this is generally useful, you might run into situations where you're working with unreliable data (such as from an external feed), or with data that you really don't want interact with in order to keep your test simple. For these situations, the `etc` method exists. ```php $response->assertInertia(fn (Assert $page) => $page ->has('message', fn (Assert $page) => $page ->has('subject') ->has('comments') ->etc() ) ); ``` The `missing` method is the exact opposite of the `has` method, ensuring that the property does not exist. This method makes a great companion to the `etc` method. ```php $response->assertInertia(fn (Assert $page) => $page ->has('message', fn (Assert $page) => $page ->has('subject') ->missing('published_at') ->etc() ) ); ``` ### Testing Partial Reloads You may use the `reloadOnly` and `reloadExcept` methods to test how your application responds to [partial reloads](/partial-reloads). These methods perform a follow-up request and allow you to make assertions against the response. ```php $response->assertInertia(fn (Assert $page) => $page ->has('orders') ->missing('statuses') ->reloadOnly('statuses', fn (Assert $reload) => $reload ->missing('orders') ->has('statuses', 5) ) ); ``` Instead of passing a single prop as a string, you may also pass an array of props to `reloadOnly` or `reloadExcept`.